

Routine service
Email the Customer Care inbox for your community so your request is on record.
Daytime Phone: 613-526-7979
Hours: Monday to Friday between 8AM and 4PM

Service after you move in: routine requests, urgent items, after-hours help and your homeowner guides. Service instructions below are for Ottawa communities.
Routine service, Ottawa
Email Customer CareDaytime phone: 613-526-7979
Monday to Friday between 8AM and 4PM
This site does not accept online Customer Care requests. Please email the Customer Care inbox for your community so every request is on record.
Email the Customer Care inbox for your community so your request is on record.
Daytime Phone: 613-526-7979
Hours: Monday to Friday between 8AM and 4PM
Call 613-526-7979, then email the Customer Care inbox for your community. A representative will reach out with next steps.
Call Service Department at 613-526-7979 and leave a message.
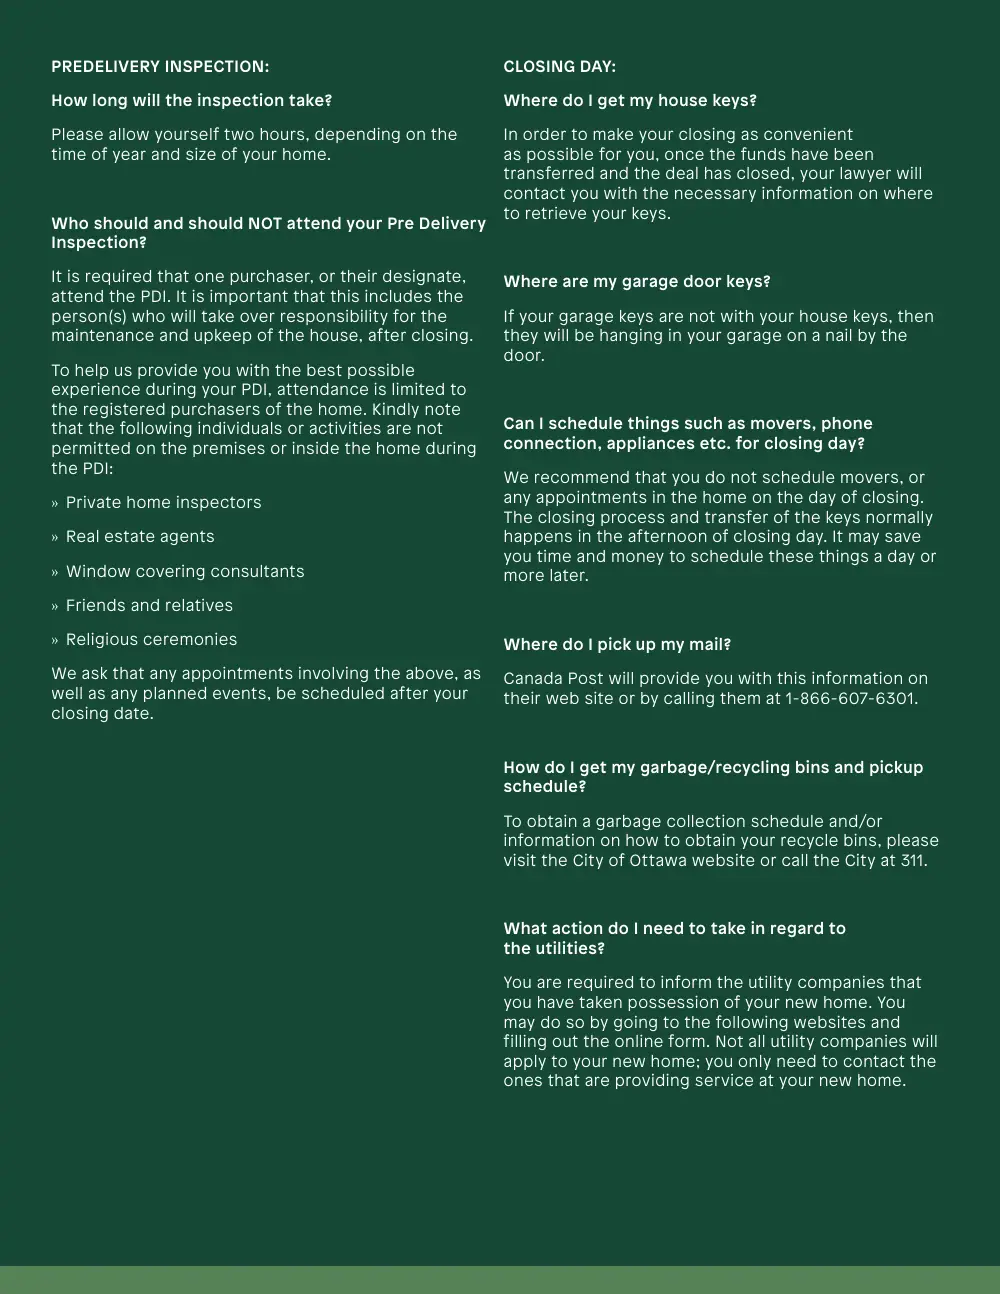
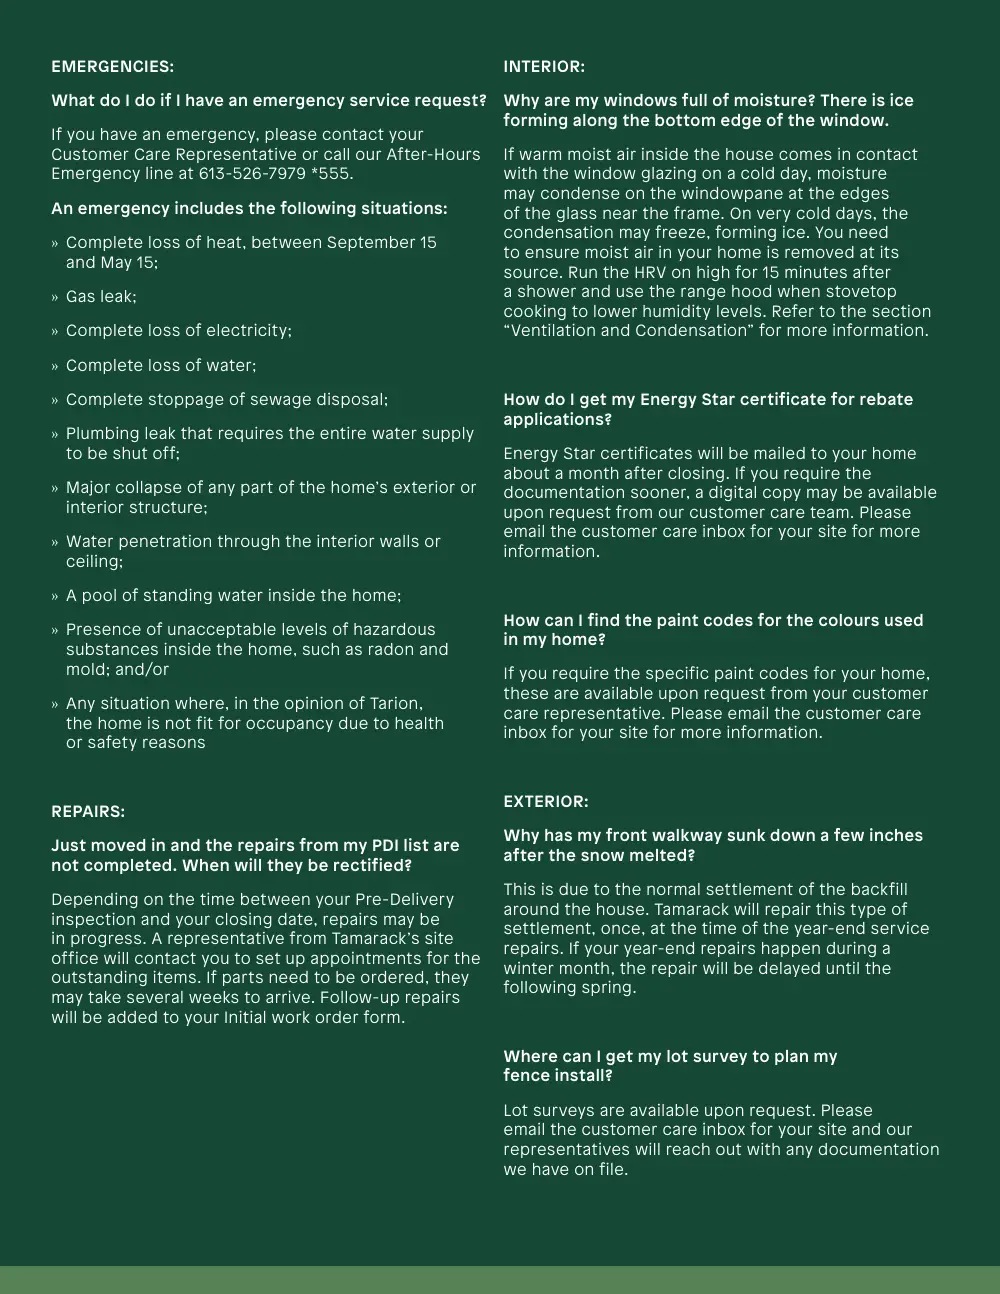
Problems associated with water penetration, plumbing, heating, or electricity that prevent use of the home or may cause major damage to the house.
Call Service DepartmentRead the homeowner guides online or download a PDF.
Read the guidesNew homes in Ontario carry Tarion warranty protection. Read what’s covered and how claims work.
Tarion warrantiesEmail the inbox for your community for routine and urgent requests. A representative will reach out with next steps.
Kim Cooper
Daytime Phone: 613-526-7979
Wendy Deschamps
Daytime Phone: 613-526-7979
Wendy Deschamps
Daytime Phone: 613-526-7979
Wendy Deschamps
Daytime Phone: 613-526-7979























Congratulations on purchasing your new Tamarack Home!
Purchasing a new home is an exciting experience. At Tamarack Homes, we strive to make the process run as smoothly as possible. The Tamarack team will guide you through the process and monitor the completion of every stage so that you have an exceptional new home experience.
Like you, every homebuyer is important to us. Our commitment to your satisfaction continues to be the foundation on which we build. That’s why we have developed this special guide. It is designed to provide you with important information about the steps that are involved in building your new home, as well as to educate you about the critical role that you play in assisting us to meet our deadlines and commitments.
We begin with an introduction to the design and construction process. On several occasions we will request your input as it relates to finishes and an overall review of the construction progress. Your participation is important to ensure that your new home is built to your specifications.
Our goal is to ensure that you’re entirely comfortable during the home buying process. We know that you’ll fill your new home with many cherished memories, and that’s why we’re committed to delivering you an experience that is enjoyable, informative and stress free.
At Tamarack Homes, we believe good friends make great neighbours. Our Friends & Neighbours Referral Program rewards you for introducing the people you care about to the communities you love. Simply complete the referral form and accompany your friend on their first visit to a Tamarack sales office. If your friend purchases a Tamarack home, you’ll receive a $2,500 reward, and your friend will enjoy a $5,000 bonus to use at the Design Centre.*
*This cannot be used in conjunction with broker referral/co-broke.
** If the home being purchased does not have the opportunity to go to the Design Centre, both parties will receive a $2500 cheque instead.
At Tamarack Homes, we value the loyalty of homeowners who choose us again. The Repeat Customer Rewards program is our way of saying thank you for coming back.
If you’ve previously owned a Tamarack home and are ready to move up or downsize, you can receive a $7,500 Design Centre bonus when you purchase your next Tamarack home.
All that’s required is proof of your previous purchase, and you’ll receive your bonus at the time of purchase, giving you extra flexibility to personalize your new home.*
*Speak with a Sales Representative for full details.
At Tamarack Homes, we are proud to recognize the strong Canadian Armed Forces presence in our region. As a token of our appreciation, the Military Homebuyer Incentive is designed to support and welcome military members and their families to our communities.
Eligible homebuyers can receive a $5,000 Design Centre bonus on a new home purchase or $5,000 off the purchase price of an inventory home.
This incentive applies to:
Proof of service is required at the time of agreement.*
*Speak with a Sales Representative for full details.
Ottawa:
At the Tamarack Design Centre, you will have the opportunity to personalize your new home with the features and finishes that reflect your individuality and lifestyle. Our design team will offer assistance and guidance to make your dream home distinctly yours.
It is important to note that if you have purchased a pre-construction home, you have 45 days from your first appointment to finalize all your selections, upgrades and changes. By finalizing your choices within this timeframe, it allows our team to keep the construction schedule on track for your new home. By the end of your third appointment, the process is complete and no further changes can be made.
Stage 1 - Getting Started - Begin Researching
Our Design Centre Coordinator will contact you to schedule the appointments that are required to complete the design centre process. We recommend that you spend some time preparing for these appointments by thinking about how you want your home to look and feel, and considering what features are important to accommodate your lifestyle.
Consider the needs of your household such as:
Start developing a wish list for your new home. Browse through the latest home decorating magazines, websites and catalogues for inspiration. Visit model homes around the city for decor ideas. Make a list of your ‘must haves’ and what items would be ‘nice-to-have’ before your appointments commence.
Stage 2 - First Appointment: Orientation
This appointment is an introductory virtual meeting to familiarize you with our Design Centre process. During this appointment you will receive an overview of the Design Center process and timeline. You will also review our Design Options Handout which is provided as a PDF attachment sent to you by the coordinator at the initial Design Center point of contact. Your coordinator will help answer your questions and make notes for your Design Consultant, who will be selecting your finishes with at the 2nd appointment. In the meantime, you will be contacted by the Muskoka Kitchen Designer, to set up your kitchen and bathroom design meeting. This meeting gives you the opportunity to customize your kitchen and bathroom needs with the Designer.
NOTE: This appointment will take approximately one hour.
Stage 3 - Develop a List of Needs and Wants
After your Orientation appointment, begin developing a list of ‘needs and wants’ as it relates to the features of your new home. The Design Options handout is a great resource guide that provides information about all the upgrade options that are available, along with costs to help with the decision-making process.
If you wish to see the standard and upgraded specifications that are offered by Tamarack we encourage you to visit the Design Centre before your 2nd appointments so that you can view the available samples.
Don’t forget to jot down any questions you may have for your Design Consultant.
Stage 4 - Second Appointment: Submit Your Wish List
During your second visit, your Design Consultant will work with you to develop a complete list of all the selections and upgrades that you are considering for your new home. Come prepared with your wish list, Design Center Options Handout, and any questions that you may have for them.
During this appointment you will select:
NOTE: This appointment will take approx. 2-½ - 3 hours
Stage 5 - Decision Making
Prior to your third, and final, appointment, your Design Consultant will send you a list of your requested upgrades along with the associated costs. This will include a price list and drawing from Muskoka.This will allow you some time to review the pricing so that you are prepared for your third appointment where you will be finalizing your selections.
NOTE: It does take time to collect all the pricing and to prepare the final list to send you to review. You will generally receive the list of upgrades approx. 1 week prior to your final appointment.
Take the time to review each item in detail and note any concerns, revisions or additional items that you may wish to consider.
Stage 6 - Third Appointment: Finalize and Approve
The purpose of the final appointment is to review selections and upgrades for your new home and to finalize your choices. Your Design Consultant will review each item in detail and make any adjustments that you request. You may add additional upgrades at this time, providing that the upgrades are noted in the pricing catalogue and do not require a custom quote.
NOTE: This appointment will take approx. 1-2 hours.
NOTE: Changes to your selections or upgrades are not permitted after your final sign-off, so we encourage you to be an active participant in finalizing, and verifying, your final choices.
Any amendments required to your Agreement of Purchase and Sale must be signed at this appointment. Copies will be provided for your personal record by DocuSign once all parties have signed the paperwork.
It is important to note that you have 45 days from your first appointment with the Design Centre to finalize all your selections, upgrades and changes. This is because many items have long delivery time frames (such as the custom-made kitchen cabinetry), and we need your selections finalized to ensure these items are installed on schedule.
All selections are subject to the final approval of Tamarack Homes to ensure that they are compatible with the other components of your home.
Once your file is complete, our construction team will review it for accuracy and schedule delivery and installation. Depending on the upgrades and the choices, extra time may be required to complete your home. You will be advised in writing shortly after the final review process should a change to your closing date be required.
Condensed Time Frame for Selections
If your home is already under construction, your Design Centre process will be 21 days and certain upgrades may not be possible. The Design Centre will be aware of your upcoming closing date and schedule your appointments accordingly.
Muskoka Kitchens | 613-526-2261
NOTE: Your design consultant will forward a copy of your cabinet selections to the kitchen designer after your 2nd Design Center Appointment. You will be asked to provide details for any appliances that are different from the standard specifications on your colour sheets
Concept Home Theatre Networks | 613-746-6663
During the construction of your new home, and after you move in, your primary point of contact will be your Customer Care Representative. This person will be in touch with you throughout the homebuilding process to schedule appointments, and to keep you up to date about the progress of your home. Once your Design Centre selections are complete, the team of experienced construction personnel will ensure that your new home is built to Tamarack’s high standards of quality construction.
At Tamarack Homes, we are continually looking for new and improved construction techniques. We offer Ontario’s best-built homes as a result of quality building materials, innovative technologies and proven construction methods. Building a new home is a complex process that involves the coordination of thousands of tasks and details.
Tamarack Homes’ priority is the safety our customers, our staff and our trade partners. Please only visit your home when invited for an inspection and accompanied by a Tamarack representative. You will be required to wear the appropriate safety gear. If you do not have your own, safety gear is available on loan from each Sales Centre. We cannot allow unscheduled visits on the construction sites while your home is under construction. Tamarack and our construction site personnel are liable for any injury that occurs on the construction site - 24 hours a day, seven days a week. This is a regulation under the Construction Safety Act, and we strictly enforce this policy.
We thank you in advance for your cooperation in keeping our construction sites safe.
1. Permit Application: In order to deliver your home; we must apply for a building permit immediately upon receipt of your firm offer. In the permit application, we include all plans and specifications that involve structural changes that you choose, as well as exterior colour selections. More information is available in the “Cut-Off Date” section of your agreement. To ensure that our construction crews have the proper time allotted to build your new home, we must apply for (and receive) the permit on time. Once permits are cleared, construction can begin.
2. Pouring the Foundation: The first step to building a quality home is laying the foundation. Tamarack Homes analyzes the size of the home, along with the soil conditions, the ground integrity and government requirements ensure that a quality structural system is built for your home. The footings are installed and your basement walls are poured.
3. Framing Your New Home: The frame is the skeleton of your new home. The framing stage usually takes three to four weeks, and consists of the following:
1. On the first day of framing, the walls start going up for the first floor.
2. Work starts on the second-floor system (if applicable), using engineered floor joists.
3. Roof trusses are installed.
4. The entire roof is completed and the windows are installed.
4. Mechanical Systems: After framing is completed on your home, the plumber, the electrician, and the heating and cooling trade partners install mechanical systems in your home. Throughout the building process, inspections take place to ensure that all building practices have been completed properly and conform to applicable building codes. Next, the insulation is installed along with the air barrier and vapour barrier. Approval from a city Inspector is required at this stage prior to drywall.
5. Drywall: The drywall is stocked in the home while the insulation, as well as the gas metre and permanent power connections are installed. It generally takes a few days to hang drywall. The drywall stage is complete once three coats of mud cover the taped seams and the attic insulation is blown in.
6. Trim and Finish Details: At this stage, your home begins to look like the home you have envisioned. The walls are primed and prepared for the final finish, while the interior trim, cabinets, counters and sinks are installed. Completion of the electrical systems occurs as shelving, bath accessories and mirrors are installed. The ceramic tile, the carpeting and the wood flooring are then installed. Prior to the Pre-Delivery Inspection and closing, the entire home is cleaned.
7. Exterior Landscaping: Exterior finishes consist of paving, interlock, walkways, sod and external painting. NOTE: Due to the seasonal fluctuations, some items may not be completed by your closing date and will be completed when weather permits.
Tamarack’s experienced construction team will co-ordinate all the necessary expertise to build your home. However, as the homeowner, you play an important role in ensuring that this process runs smoothly.
We require your involvement in the building process for the following scheduled events:
1. Frame Check Walk-Through: Once the framing and electrical wiring is complete and prior to installing drywall, your Customer Care Representative will contact you to schedule a frame check walk-through with the Construction Site Supervisor. This allows you to see the framing and mechanical systems before the walls are installed. You have an opportunity to observe any structural changes you may have made, as well as learn about the construction of your home. Our Site Supervisor will highlight the many extra features found in a Tamarack ENERGY STAR® Home. Feel free to ask questions. We value your input and observations during this time.
NOTE: The Occupational Health and Safety Act of Ontario must be always adhered to. Therefore, safety hats and steel-toed footwear must be worn, and other safety regulations must be followed. Safety wear is available on loan from each Sales Centre.
2. Pre-Delivery Inspection: As your closing date approaches, your Customer Care Representative will contact you to schedule your Pre-Delivery Inspection. The Pre-Delivery Inspection is conducted with a Tamarack Inspector approximately five days prior to your closing date. The purpose of the Pre-Delivery Inspection is for you to view the completed home, and to learn about the associated systems and operations. At this time, some minor work may still be underway, and the home will be scheduled for a final cleaning after all work is completed.
NOTE: We do not recommend children attend the inspection, or that you use the occasion to show your new home to friends or family. The focus of the Pre-Delivery Inspection is to examine the house and produce accurate written documentation as to its condition prior to your closing date.
At the end of the inspection, you will receive a package of information about your new home. Among other things, the package contains important documents including your Certificate of Completion and Possession (CCP), a utility reading report for you to complete on the day of closing, your Tarion Pre-Delivery Inspection (this should correspond with the Pre-Delivery List).
Once the Pre-Delivery Inspection is complete, your Pre-Delivery Inspection List is forwarded to Tamarack’s site office for follow-up action. If all the items are not completed prior to your closing date, the site office will work with you to complete them after you move in. Depending upon the season, or the availability of materials and labour, it may not be possible to complete certain items until weather conditions are suitable.
Tamarack Homes understands how much your investment means to you, so we do the best we can to provide you the best possible service - from the start of the home buying process until the end.
The closing date is the day that the home and property legally become yours. Typically, the week before closing, your lawyer will contact you to arrange a time to sign the appropriate legal documents, and to secure your mortgage and home insurance details. Your lawyer will also arrange for the transfer of funds to Tamarack’s lawyer. Once the transfer of funds is complete and the necessary registration has taken place, your lawyer will be provided with information required to obtain your keys.
NOTE: Timing is in the hands of the lawyers. Please do not make arrangements for moving vans, or the delivery of appliances, early in the day. We have found that final closing and the transfer of keys typically happens late afternoon. You could save time and money by keeping this in mind on moving day. Once you receive the keys, the house is all yours!
On the day of closing, your new home warranty begins. The Tamarack Customer Service Team will be there every step of the way to help take care of any problems that may arise and answer any questions about your new home.
NOTE: For any new home, several appointments are required throughout the first year of occupancy to complete service work. Service personnel will require access to the home and appointments will take place during regular business hours.
The Tarion Warranty Corporation backs the warranty on your new Tamarack Home. There are guidelines as to when to submit your repair items to Tamarack, however our Customer Service Department is available at any time to handle urgent requests, or deal with concerns.
More information about the warranty process will be provided to you at your Pre-Delivery Inspection. In the meantime, if you would like to learn more, please visit: www.tamarackhomes.com (click on Customer Service) or www.tarion.com
Tamarack is a leading ENERGY STAR® homebuilder. Every Tamarack home is 20-30% more energy efficient than a standard home built to the Ontario Building Code and is certified by a third-party inspection agency. You will receive an ENERGY STAR Homeowner’s Information Package if your home is registered with the ENERGY STAR program, along with improved comfort level and lower utility bills.
Even before you move into your home, the home building process can have a significant impact on the environment. The building materials that are installed, the building practices that are used, along with the waste management that is practiced by Tamarack, can impact your family’s health - inside the home, and in the community in which you will live.
Tamarack Homes strives to minimize the impact of residential construction on our natural resources through the use of sustainable products, waste reduction and water conservation.
Tamarack Homes has emerged as a leader in energy efficient homebuilding.
We are continuously looking at ways to maximize energy savings and to conserve water for our homeowners, while minimizing our impact on the environment during the construction process.
In our communities, Tamarack Homes has refined the land planning and development process to better incorporate the preservation of natural landscapes and focus on storm water management procedures.
In our operations, we also strive to ensure that our offices and jobsites operate according to our sustainability principles.
You will benefit from lower energy costs as it relates to heating and cooling your home, along with improved air quality, reduced drafts, and water conservation. Thank you for choosing an ENERGY STAR Tamarack Home.
We understand that the home building process is very exciting, and sometimes overwhelming. You have a story to tell about your experience, we’re listening. Throughout the home buying experience, you will have the opportunity to complete three different customer satisfaction surveys so that you can tell us how well we met your expectations in terms of customer service, your new home and your new community.
We have hired a third-party independent research company, CustomerInsight™, to conduct the surveys - once before you move in, and once during your first year of occupancy.
We look forward to receiving your feedback.
Please find a list of the personnel who can answer any questions you may have.
NOTE: After the point of sale, your Customer Care Representative will remain your main point of contact.
Head Office: Tamarack Developments, 3187 Albion Road South. Ottawa, ON
Telephone: 613-739-2919
Ottawa
Email: swinges@tamarackhomes.com
Ottawa
Email: jrot@tamarackhomes.com
Ottawa
Email: megan.vanrijt@tamarackhomes.com
Edenwylde, Westwood, and Idylea
Email: westwoodcustomercare@tamarackhomes.com edenwyldecustomercare@tamarackhomes.com idyleacustomercare@tamarackhomes.com
Cardinal Creek, The Meadows
Email: cardinalcreekcustomercare@tamarackhomes.com
Findlay Creek
Email: findlaycreekcustomercare@tamarackhomes.com
Cardinal Creek
Email: jkerr@tamarackhomes.com
Findlay Creek
Email: stephanie.vintinner@tamarackhomes.com
The Meadows
Email: dennis.regnier@tamarackhomes.com
Idylea & Westwood
Email: jia.zhang@tamarackhomes.com
Ottawa
Email: kknuth@tamarackhomes.com
| Service | Contact | Phone Number |
|---|---|---|
| Gasw | Enbridge | 613-741-5800 |
| Gasw | Reliance | 1-888-837-1451 |
| Gasw | Vista | 1-877-318-4782 |
| Electricity | Hydro Ottawa | 613-738-6400 |
| Electricity | Hydro One | 888-664-9376 |
| Water | Regional Water | 613-560-2050 |
| Mail Delivery | Canada Post | 800-267-1177 |
| Hot Water tank | Enercare | www.enercare.ca |

















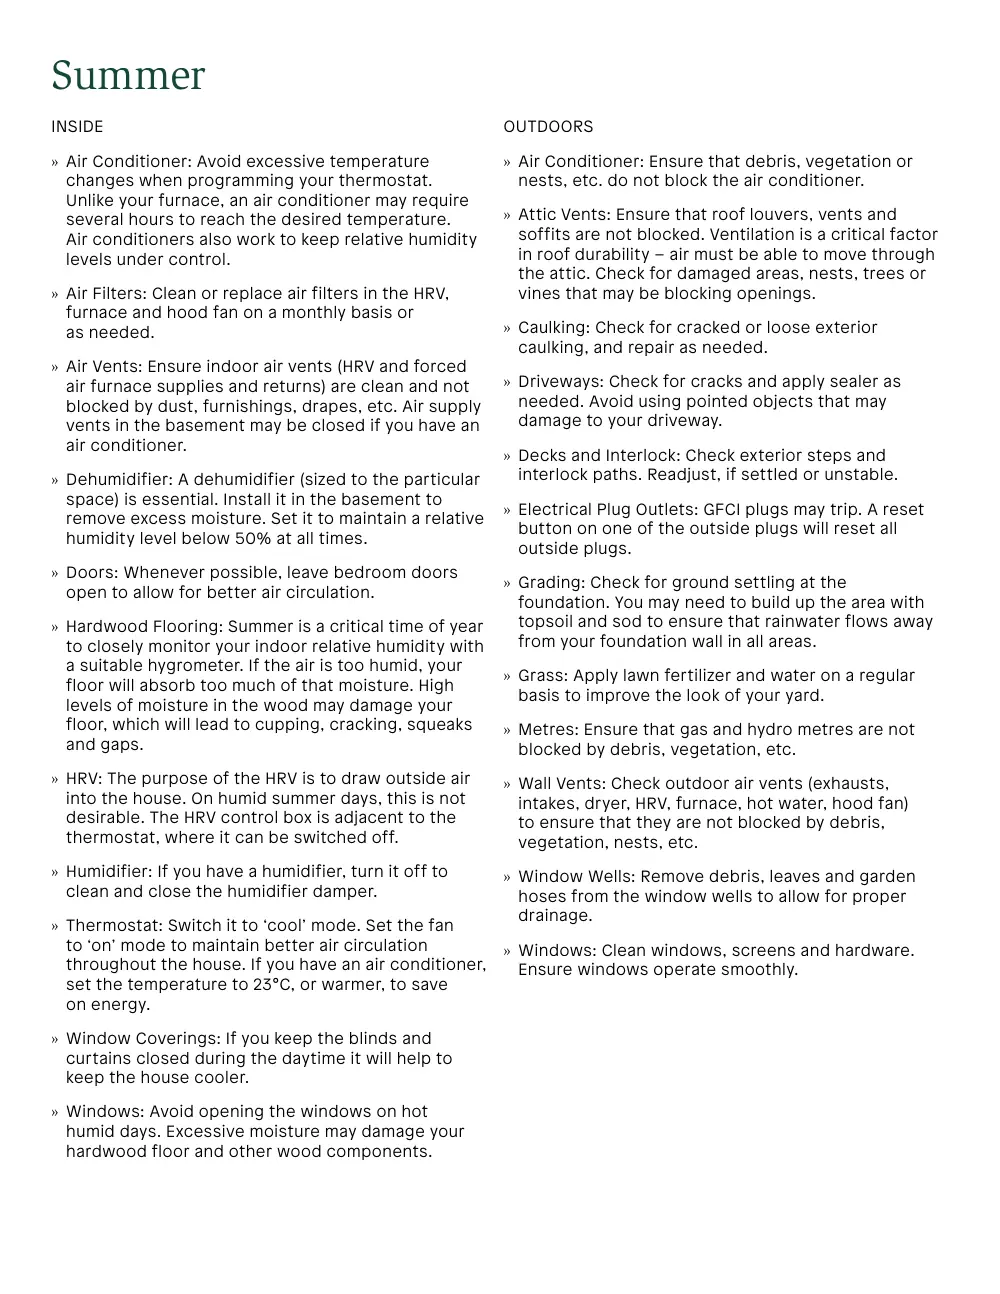
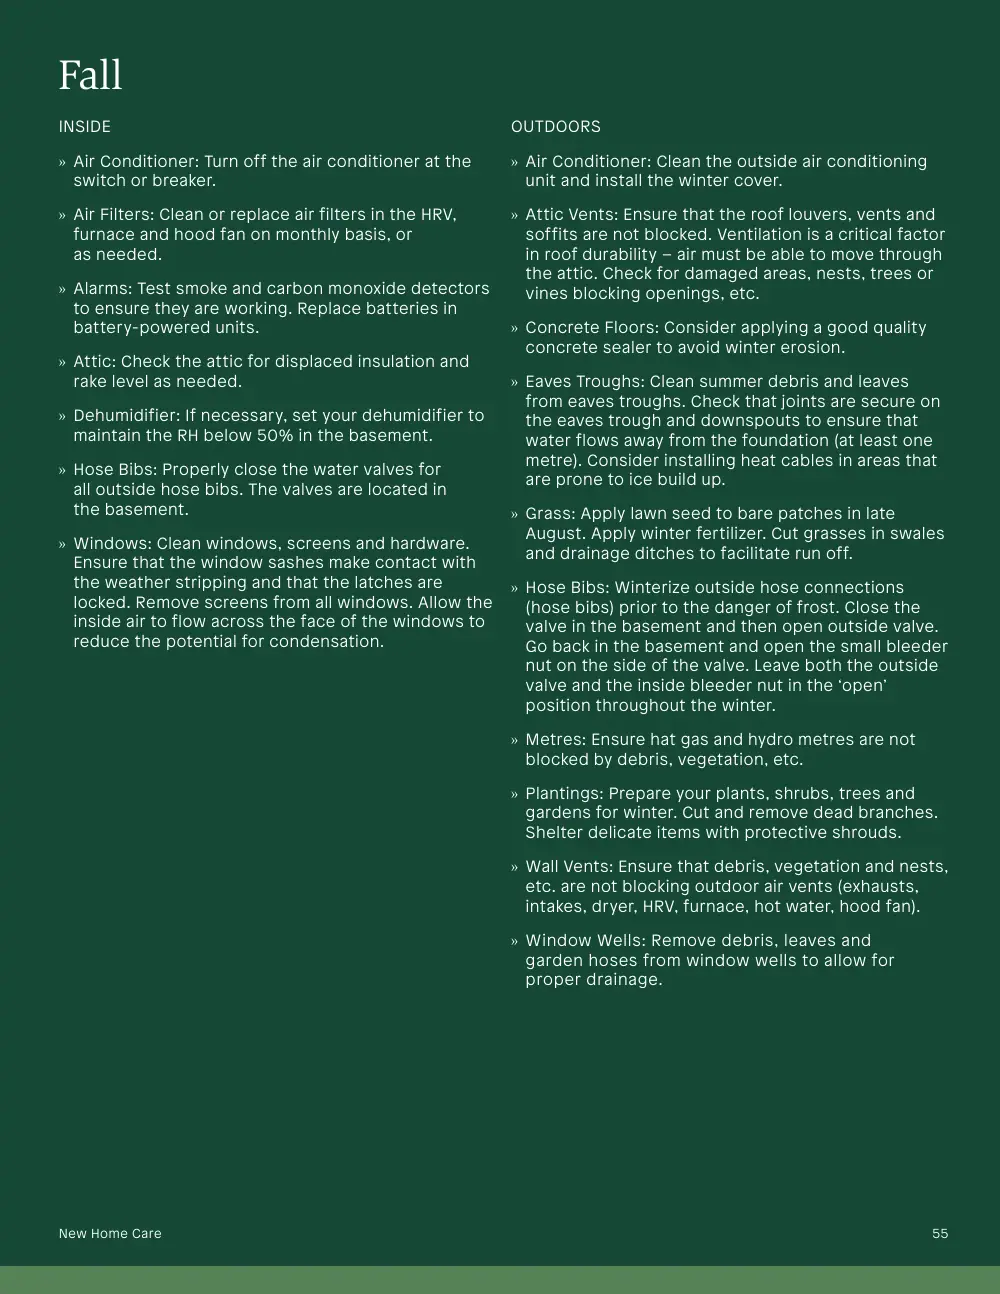
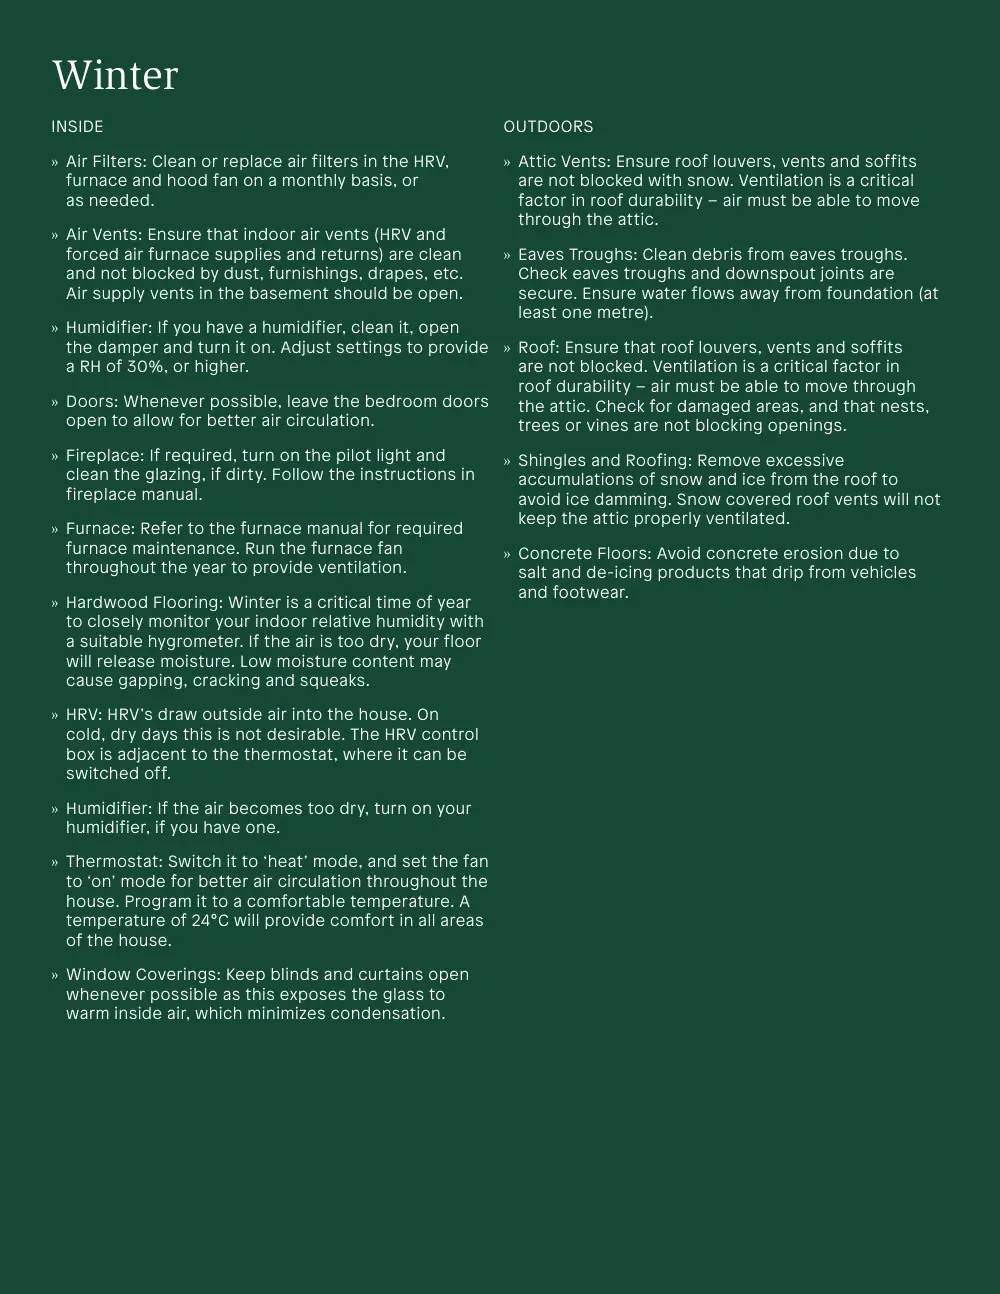







Care and maintenance are required to ensure that your home offers comfort, safety and efficiency for years to come. This New Home Guide has been prepared as a reference guide to provide you the required information to best maintain your home and protect your investment.
Keep these resources handy and refer to them when necessary, as they contain a wealth of useful information about your new home.
Every new homebuilder in Ontario is required to follow to the guidelines and standards set forth by the Tarion Warranty Corporation. The following summarizes the Tarion new home warranty coverage:
ONE-YEAR WARRANTY
Tamarack Developments warrants for one year that your new ENERGY STAR® home is:
TWO-YEAR WARRANTY
Tamarack Developments warrants your home for two years against the following:
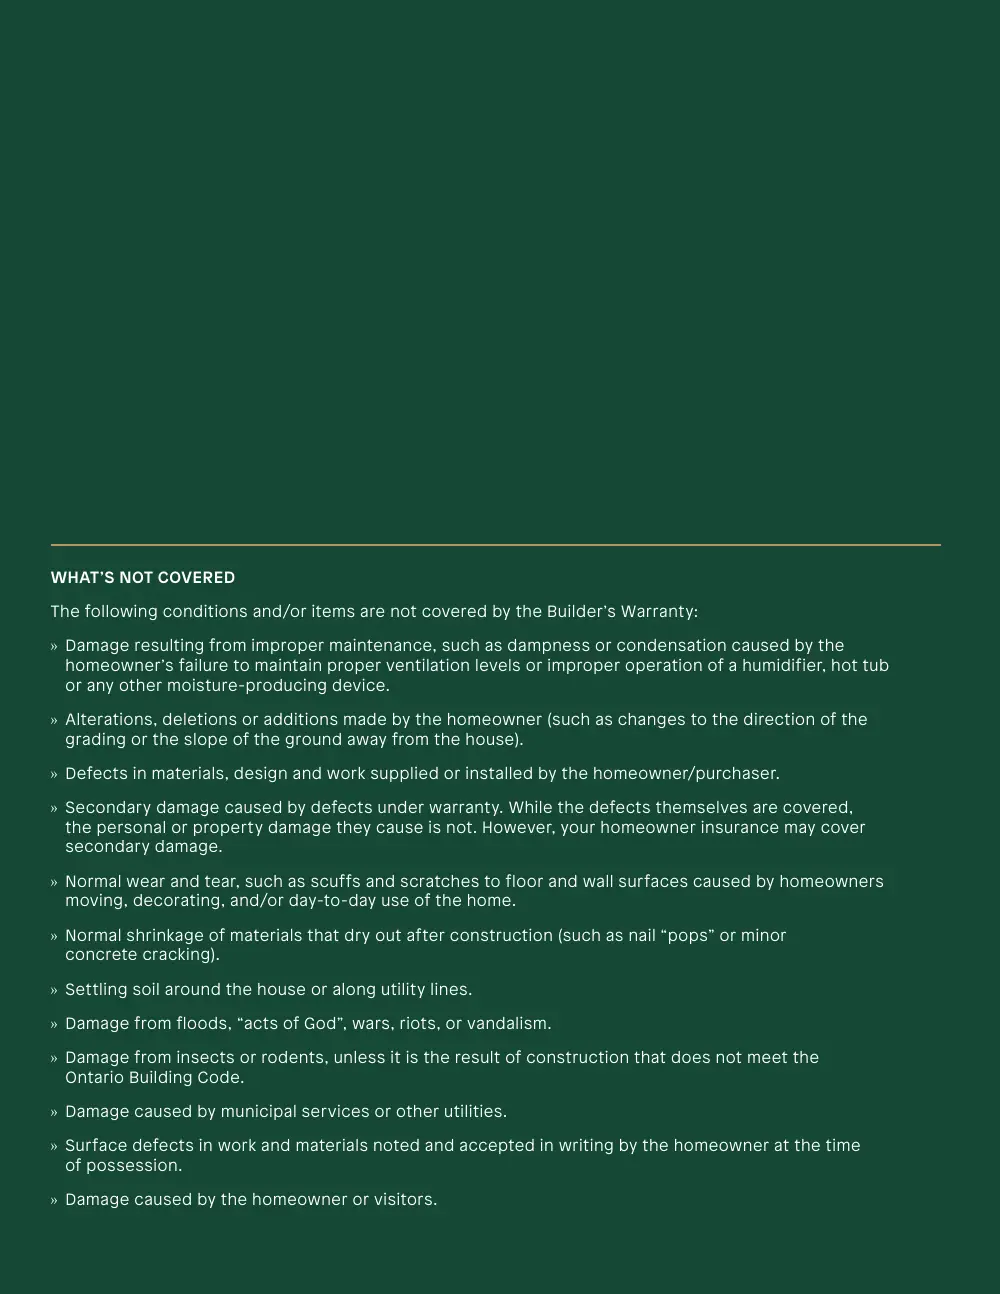
WHAT’S NOT COVERED
The following conditions and/or items are not covered by the Builder’s Warranty:
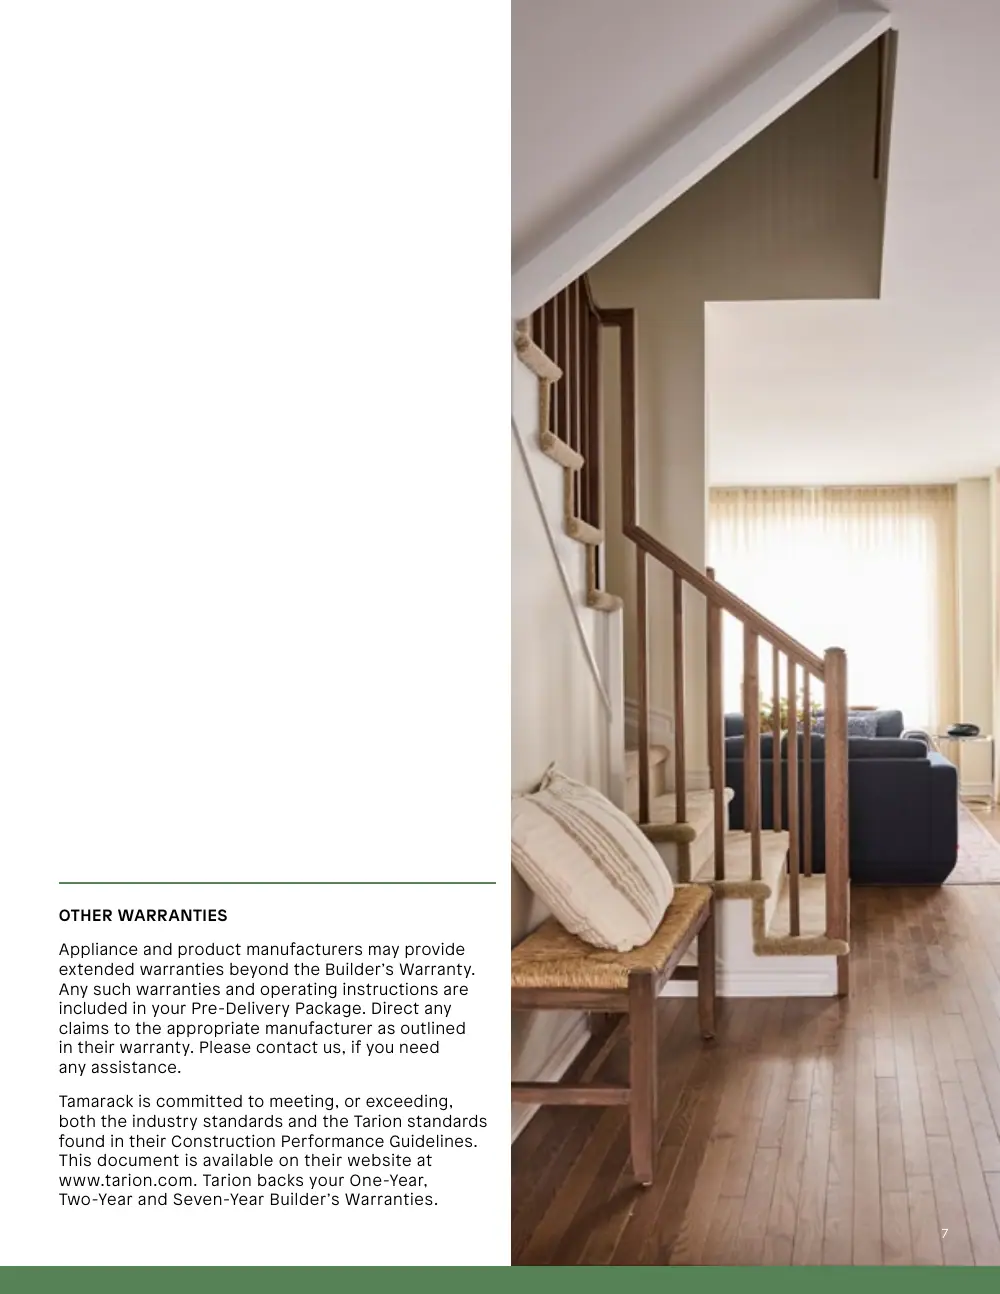
OTHER WARRANTIES
Appliance and product manufacturers may provide extended warranties beyond the Builder’s Warranty. Any such warranties and operating instructions are included in your Pre-Delivery Package. Direct any claims to the appropriate manufacturer as outlined in their warranty. Please contact us, if you need any assistance.
Tamarack is committed to meeting, or exceeding, both the industry standards and the Tarion standards found in their Construction Performance Guidelines. This document is available on their website at www.tarion.com. Tarion backs your One-Year, Two-Year and Seven-Year Builder’s Warranties.
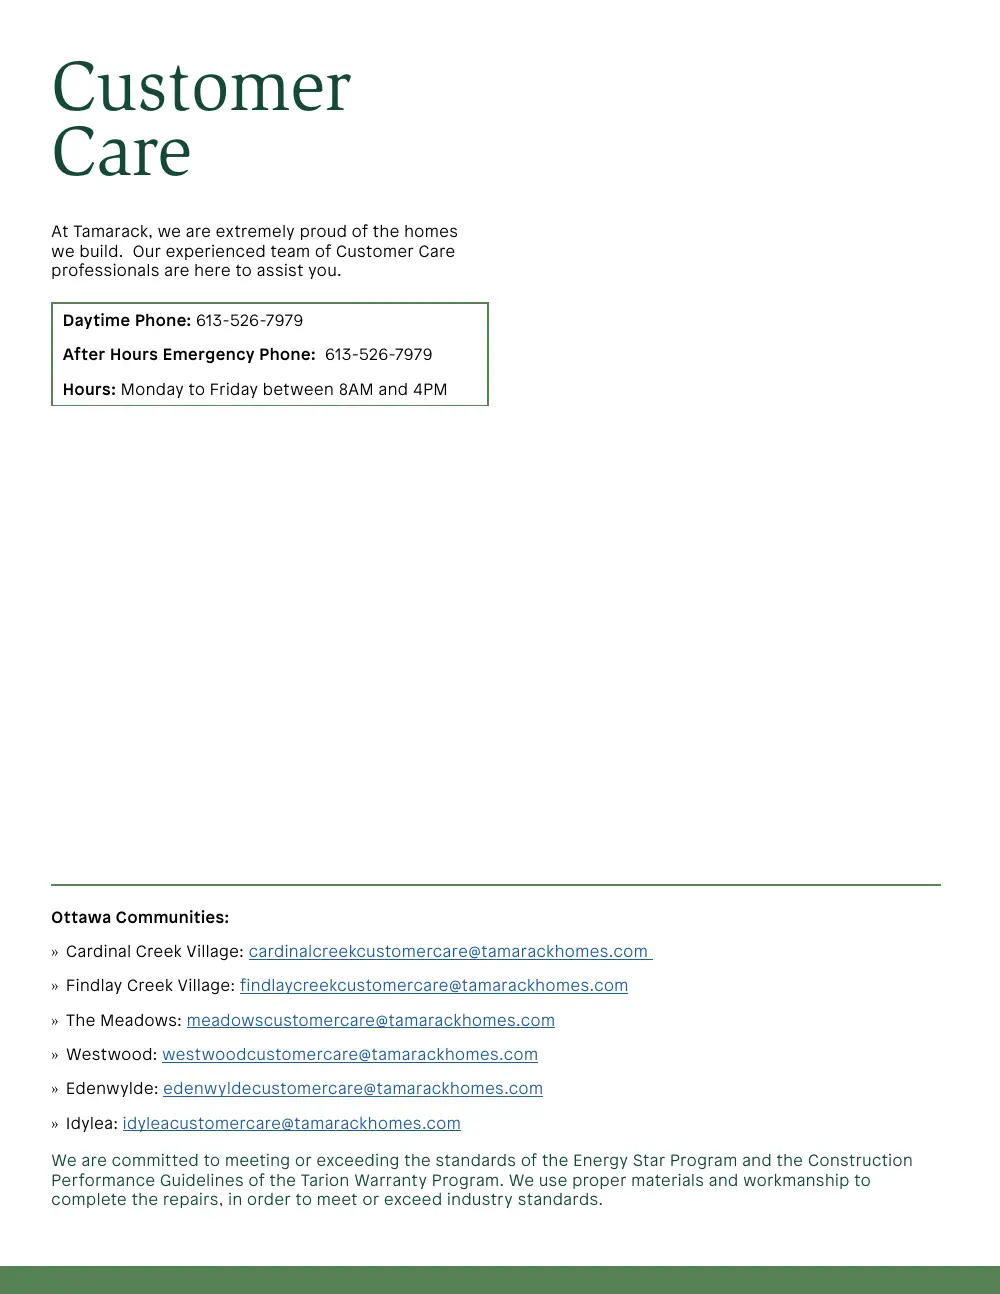
At Tamarack, we are extremely proud of the homes we build. Our experienced team of Customer Care professionals are here to assist you.
Daytime Phone: 613-526-7979
After Hours Emergency Phone: 613-526-7979
Hours: Monday to Friday between 8AM and 4PM
Ottawa Communities:
We are committed to meeting or exceeding the standards of the Energy Star Program and the Construction Performance Guidelines of the Tarion Warranty Program. We use proper materials and workmanship to complete the repairs, in order to meet or exceed industry standards.
At Tamarack Homes, we have a dedicated team of service professionals ready to assist you through your home ownership journey. Details for requesting warranty service can be found in your PDI package on the Warranty Service Procedure letter. If you have any questions or require assistance understanding the warranty process, please reach out to your customer care representative at the site emails listed above. Customer care representatives are available Monday-Friday between 8am-4pm. Please allow two-day response time for non-urgent inquiries.
Tamarack’s Customer Care Department has a process in place that allows you to report warranty issues at designated times. Our experience has shown that this process allows us to resolve warranty items efficiently, with minimum disruption to your family and work schedules.
Initial Warranty Form | Once you create and submit your deficiency list on the Tarion portal, our customer service representative will be notified. Once received, we will reach out via email to schedule an inspection appointment. This appointment will give you the opportunity to meet with an experienced and qualified Tamarack Home Inspector, to discuss maintenance and warranty concerns related to your home. The Inspector will review the concerns with you and determine whether they are covered under the home warranty. Warranted items are documented on the Tamarack Initial work order, which is mailed to you after the inspection. This work order is used to initiate the repairs and is the same form our service staff and trades will work from.
At the inspection you will also be given a repair date, based on the number of items requiring repair. Repair dates are scheduled a minimum of four weeks after the inspection.
After the Initial Inspection, Tamarack will not inspect or process any more new items until your Mid-Year Inspection unless they are of an urgent nature. Please do not submit service requests to the site office at any time since they cannot be processed from that location
6-Months After Closing – Mid Year Warranty Form | This form allows you to document and submit any items noticed between your initial inspection and your year end anniversary. Once you create and submit your deficiency list on the Tarion portal, our customer service representative will be notified. Once received, we will reach out via email to schedule an inspection appointment. This appointment will give you the opportunity to meet with an experienced and qualified Tamarack Home Inspector, to discuss maintenance and warranty concerns related to your home. The Inspector will review the concerns with you and determine whether they are covered under the home warranty. Warranted items are documented on the Tamarack Mid Year work order, which is mailed to you after the inspection. This form work order is used to initiate the repairs and is the same form our service staff and trades will work from.
1 Year After Closing – Year End Warranty Form | Your year end warranty form will follow the same process as all other inspections. Once you create and submit your deficiency list on the Tarion portal, our customer service representative will be notified. Once received, we will reach out via email to schedule an inspection appointment. We suggest that, as you notice any repair items after the Mid Year Inspection, you prepare a list to bring these items to our attention prior to the end of your warranty period.
Second Year After Closing | Tamarack Developments does not pre-schedule inspections after your YearEnd service work. If an item comes up that is covered under the second-year warranty, you can submit a second-year form through the Tarion portal up until your 2nd anniversary date.
Urgent Items and Emergencies | For any items that arise that are urgent in nature, please email the customer care inbox for your community and a representative will reach out with next steps.
EMERGENCIES: Evenings, Weekends & Holidays
This service is available to deal with problems associated with water penetration, plumbing, heating, or electricity that prevent you from using your home or may cause major damage to the house.
In the event of an after-hours emergency, call our Service Department at 613-526-7979 and leave a message.
Seasonal Items | Most often, the exterior of your home will be incomplete at occupancy. Depending on the season, some items may not be completed until suitable weather conditions allow. Paint, curb, driveway and landscape crews generally begin work in late May. Exterior work that does not require access to your home will be completed between May – October, as weather conditions permit, and when crews are working in the area. Our customer care representatives will keep you updated on the progress of exterior repairs.
Our dedicated customer service team is here to assist you through the new home warranty process, and also to handle any of your questions or concerns. Below is a list of our team members that you will be dealing with during your warranty period:
1. Customer Care is your primary point of contact. Customer Care Representatives will contact you to schedule inspections, work days, and provide status updates. Customer Care is here to answer all of your questions and handle any concerns.
By directing your inquiries through Customer Care, all information related to your new home will be managed in one file, and properly documented for future reference. This will help to protect your new home warranty and also ensure that everyone at Tamarack has access to the current status of your file.
2. Inspectors are responsible for conducting all inspections in the home, from the Pre-Delivery Inspection onward. Tamarack Inspectors are experienced construction professionals, who provide guidance and expertise in addressing warrantable items in your home, in accordance with the Ontario Building Code, and Tarion Construction Performance Guidelines.
Your Inspector will provide you with a demonstration of your home during the Pre-Delivery Inspection, including training on how to use the systems, such as electrical, plumbing and heating/cooling. After you move in, your Inspector will visit you again to review your Initial, Mid Year, and Year End lists, to confirm the items covered under your new home warranty.
3. Service Technicians will work alongside our Trade Partner service staff to complete the warranty repairs in your home. A Tamarack Service Technician will be present in your home during any scheduled work days, and will liaise with our Construction Department and Customer Care to ensure that the process runs smoothly.
Tamarack’s hours for all inspection dates and repair dates are Monday to Friday between 8:00 am and 4:00 pm. We understand that you may have other obligations during these hours, so we strive to schedule all service personnel and trade partners to work on the same repair at the same time to minimize disruption to your family and personal schedule. Keep in mind that certain items, especially those involving drywall and paint, require several visits to complete.
Your cooperation and patience are appreciated as we work together to resolve these items. Although our goal is to repair all items on the repair dates, there may be instances when materials are back ordered, or seasonal items are deferred until the summer months. If seasonal items require access to the house, Tamarack will contact you for a repair date. If not, Tamarack will not contact you for a repair date.
We will not undertake a repair if there is a risk of damaging your furniture or personal items. Please ensure that vulnerable items in the area of any repairs are moved and covered up prior to your service visits.
Tamarack may involve trade partners to perform certain repairs in your home. On occasion, a Tamarack trade partner may call you directly to schedule a repair date. This can happen if materials are on backorder, or if a follow up appointment is required. Trade partners may also repair exterior items on your home without scheduling an appointment, if they are working in your neighbourhood.
Throughout the first year, after construction, your home will go through a period of minor settlement, and shrinkage of products, such as lumber and concrete will dry out. You may notice the appearance of nail pops, or cracked drywall, concrete, caulking, and grout. These items are not covered under the home warranty, however Tamarack has a courtesy service to assist you with the repair of these items. If you choose to take us up on this service, please report the items to us at the Year-End inspection date. The repairs of all settlement cracks, gaps or nail pops are a one-time courtesy service provided by Tamarack at the same time of the year-end repairs. This service includes patching or caulking of the affected area. It does not include sanding or paint repairs of the affected area.
With the exception of seasonal items, we strive to complete all items from a Warranty Claim Form within four months of the inspection. We use quality materials and skilled labour to complete the repairs.
To assist us in keeping your file up to date, service personnel will request your signature on completed work orders. This allows us to keep your file current, and to follow up on incomplete items. On the day of the repairs, our service personnel will be prepared to deal with the items on the relevant form.
Our experience has shown that you are best served when warranty items are dealt with on these anniversary dates, rather than through multiple service visits whenever something comes up. For this reason, ‘new’ items that come up after a form has been submitted, should be listed on the subsequent warranty form when the time comes. If an urgent problem arises, that was not documented on your warranty form, please contact your service representative.
Your ENERGY STAR® home has one of the highest efficiency heating systems available. The main supplyand return ductwork is sealed to reduce leakage. The furnace has three features designed to keep your heating costs as low as possible, while providing a comfortable indoor environment. They include:
1 High-efficiency, condensing, sealed combustion system - Your furnace is one of the most efficient models on the market with an Annual Fuel Utilization Efficiency (AFUE) rating greater than 95%.
2 Two-stage burner - In a conventional furnace, the burner is sized to provide adequate heat on the coldest day of the year. On days when less heat is required, the burner is significantly oversized, causing the furnace to operate less efficiently. With the two-stage burner, the heat output attempts to match the heating requirements of the house at any given time, thus saving energy.
3 Very energy efficient Electronically Commutated Motor (ECM) fan motor - An electronically controlled fan motor can use up to 80% less electrical energy when compared with the fan motor in a conventional high efficiency furnace. The electricity required to run a conventional fan motor can cost more than the gas used to heat the home.
Furnaces and natural gas water heaters require an air supply for combustion (burning fuel to produce heat). Combustion air is delivered directly though a plastic pipe. A gas furnace and a gas water heater require these air supplies to work properly. High efficiency furnaces and water heaters do not require a chimney. Instead, they exhaust the combustible gases through plastic pipes in the side or rear foundation wall of your house, or, in some instances, through the roof.
If we provided your cooling system, the air conditioner is ENERGY STAR-qualified with a Seasonal Energy Efficiency Ratio (SEER) factor of at least 14.
An ENERGY STAR-qualified thermostat controls your heating and cooling system. The thermostat is located in a central location of the house away from direct sunlight. It controls the heating and cooling for the whole house.
Troubleshooting
After settling in to your new home, you may find the heating/cooling system is not balanced to your preferences. Certain rooms may be warmer or cooler than you desire. You can change the balance by adjusting the dampers installed on the individual ducts leading to each room.
If you wish to adjust dampers, they can be accessed either from the unfinished area of the basement, or by removing the heat register and reaching into the duct. To identify which duct supplies which room, it it’s advisable to have one person in the room and one person in the basement. Remove the floor register in the room and tap inside the duct with a spoon. The sound will carry to the basement. The person in the basement will be able to determine which duct is leading to that particular room.
NOTE: Balancing changes can seriously affect the overall performance of the heating and cooling system. In particular, if too many dampers are closed, the total airflow from the furnace may be reduced, resulting in poor overall heating and cooling performance. Cold rooms are often a result of improperly altered balancing, dirty furnace filters, improper thermostat settings and/ or furniture or drapes that may be blocking the vents.
The thermostat for the heating and cooling system senses the air temperature at that location. During periods of extremely hot or cold weather, it is not uncommon to have a temperature difference of as much as 5°C between different areas within the house. If the furnace does not seem to warm part of the house, ensure that some other heat source, like a lamp or the sun, is not influencing the thermostat.
Furnaces are equipped with a shut-off switch for maintenance and repair purposes. The switch is located in the basement. If your furnace fails to start, ensure that the switch has not been shut off.
Maintenance
To maintain safe and efficient operations of the furnace and water heater, ensure that snow and vegetation do not cover, or impede, the flow of air through either the air intakes or the exhaust vents. Change the furnace filter every month for maximum efficiency. Digital thermostats are battery powered. The batteries will require replacement from time to time.
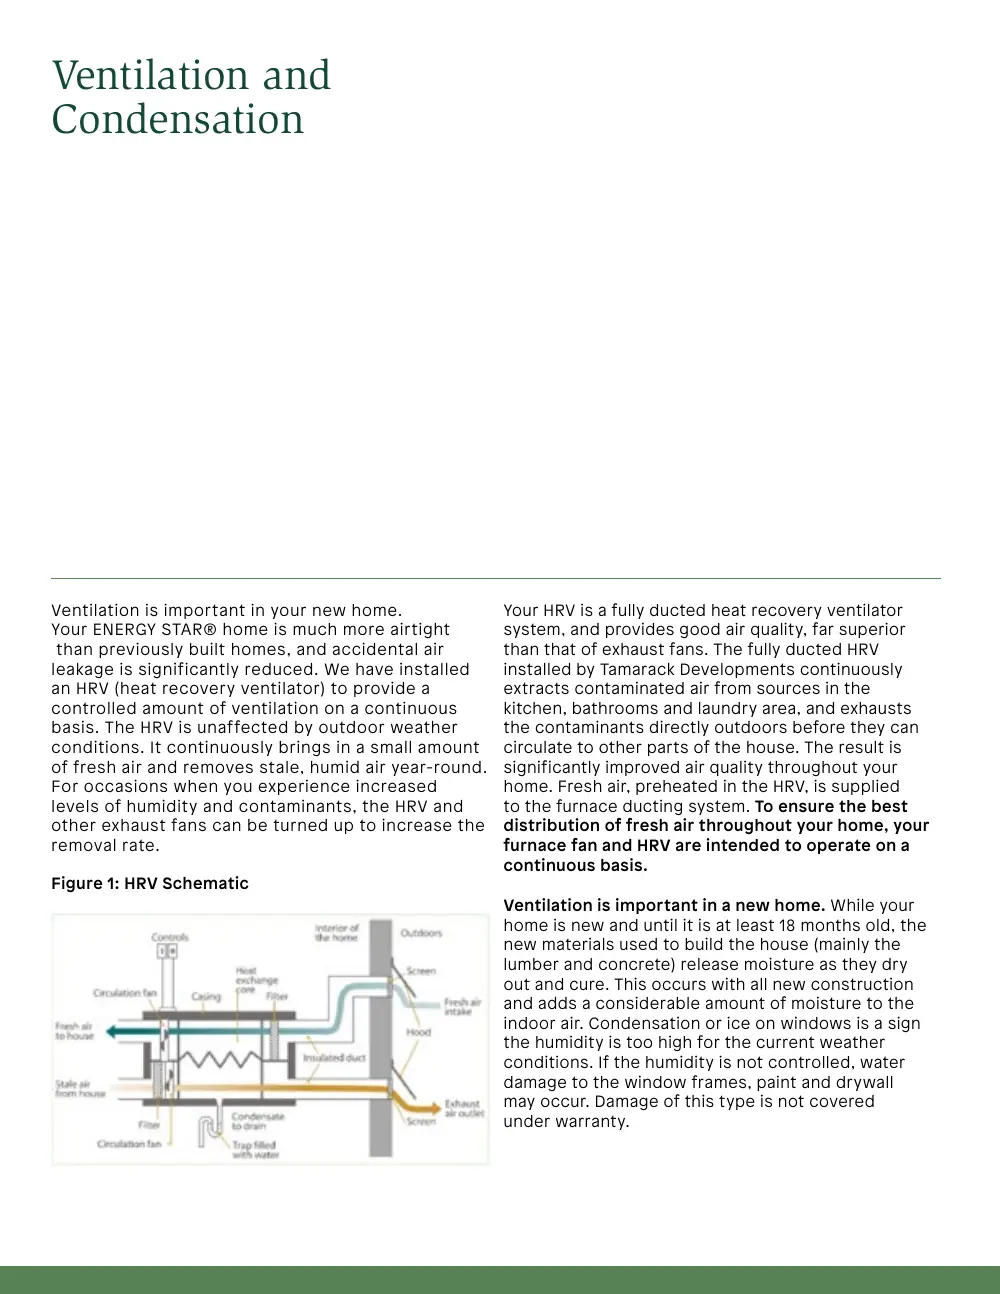
Ventilation is important in your new home. Your ENERGY STAR® home is much more airtight than previously built homes, and accidental air leakage is significantly reduced. We have installed an HRV (heat recovery ventilator) to provide a controlled amount of ventilation on a continuous basis. The HRV is unaffected by outdoor weather conditions. It continuously brings in a small amount of fresh air and removes stale, humid air year-round. For occasions when you experience increased levels of humidity and contaminants, the HRV and other exhaust fans can be turned up to increase the removal rate.
Figure 1: HRV Schematic
Your HRV is a fully ducted heat recovery ventilator system, and provides good air quality, far superior than that of exhaust fans. The fully ducted HRV installed by Tamarack Developments continuously extracts contaminated air from sources in the kitchen, bathrooms and laundry area, and exhausts the contaminants directly outdoors before they can circulate to other parts of the house. The result is significantly improved air quality throughout your home. Fresh air, preheated in the HRV, is supplied to the furnace ducting system. To ensure the best distribution of fresh air throughout your home, your furnace fan and HRV are intended to operate on a continuous basis.
Ventilation is important in a new home. While your home is new and until it is at least 18 months old, the new materials used to build the house (mainly the lumber and concrete) release moisture as they dry out and cure. This occurs with all new construction and adds a considerable amount of moisture to the indoor air. Condensation or ice on windows is a sign the humidity is too high for the current weather conditions. If the humidity is not controlled, water damage to the window frames, paint and drywall may occur. Damage of this type is not covered under warranty.
Below are a few tips on dealing with excess humidity.
Even after the first year, humidity control is very important. The number of people living in the house and their related lifestyle influences the level of humidity. Chart A lists some of the sources of moisture in a typical house.
Chart A: Typical Moisture Sources in a New Home for a Family of Four
Adapted from: Natural Resources Canada
As the outside temperature drops during the fall and winter, you should also reduce inside humidity levels. Chart B shows the maximum relative humidity levels for various outside air temperatures to keep double-glazed windows free of condensation. Although your windows are superior to the ones tested for this chart, Canada Mortgage and Housing Corporation and Health Canada both recommend keeping humidity levels around 30% during very cold weather to avoid condensation.
| Outside Air Temperature: Celsius | Outside Air Temperature: Fahrenheit | Desirable Maximum Indoor Relative Humidity (5) at an Indoor Temperature of 21°C (70°F) |
|---|---|---|
| -29°C | -20°F | 20% |
| -24°C | -10°F | 25% |
| -18°C | 0°F | 30% |
| -12°C | 10°F | 35% |
| -7°C | 20°F | 40% |
A humidity meter (hygrometer) allows you to monitor humidity changes. Keep in mind that lowering the relative humidity below 30% may affect other items in the house, such as shrinkage cracks in drywall and hardwood flooring. At very cold temperatures, it may be impossible to keep windows completely free of condensation without causing wood to shrink or twist.
Maintenance
Maintain proper humidity levels by maintaining the ventilation devices installed in your home. Clean the HRV filters, HRV exchanger core, HRV inlet grilles and the range hood filter. It is also important to wipe condensation from windows to avoid damage to the finished surfaces.
Make the Best Use of Your HRV
Your HRV is a powerful tool for improving the indoor air quality in your home. For maximum efficiency and to effectively ventilate your whole home, it’s advisable to run it on low speed and clean the filters every few months. On some occasions, you may want to adjust your HRV to better optimize the indoor air quality in your home.
A) Consider turning off your HRV during very hot, humid summer days to avoid drawing hot, humid air into your house. This will reduce air conditioning costs and keep the house cooler.
B) Consider turning off your HRV during the very cold, dry winter days to avoid drawing extremely cold, dry air into your house. This will reduce heating costs and avoid drying the house out too much.
C) If you notice condensation on your windows on very cold days during the winter, consider turning the fan speed to high in order to exhaust the moist air and exchange it with fresh, dry air. (A simple way to temporarily increase the HRV fan speed is to turn on the bathroom timer for 30 minutes).
D) Consider temporarily turning your HRV off, if you detect unpleasant outdoor odours, such as a skunk smell. Once the odour is gone from the outdoor air, turn on your HRV and run it on high for 30 minutes to refresh the indoor air.
For specific instructions on cleaning your HRV, refer to the manual provided by the manufacturer. Your HRV has exterior intake and exhaust grilles. Regularly inspect, and clean the grilles, (especially the intake grille) to ensure that they are clean. Make certain that snow and vegetation do not cover, or impede, the flow of air through the air intakes or the exhaust vents.
A Word about Mould
Ventilation and moisture control are two important tools for controlling the growth of mold in your home. Mold spores are allergens to some people and, if left unchecked, molds can damage your house. Provided they have sufficient moisture, molds grow at normal room temperatures, on wood, carpet, drywall, soap scum or any organic material.
Avoid mold problems by eliminating potential sources of moisture, such as humid air, leaks, spills, overflows, standing water, or condensation. Run your HRV on high while you and your family bathes, showers, and washes and keep it running for at least 15 minutes afterwards. Use the range hood while cooking and also keep it running for at least 15 minutes afterwards. Regular vacuuming, cleaning the furnace filter and cleaning bathroom tiles also prevent mold growth. Outside the home, maintain proper drainage away from foundation walls, avoid spraying the house with a sprinkler, keep the eavestroughs clean, and repair cracked or damaged caulking.
Your ENERGY STAR® home is one of the best-insulated and sealed houses available today. A well-insulated and sealed house reduces your energy costs and is very comfortable.
Your attic is insulated with either batt insulation or blown-in insulation, depending upon the situation. The attic insulation levels are at least 25% greater than the Building Code requirements. The exterior walls contain batt insulation, along with an insulated sheathing that reduces thermal bridging. The insulated sheathing is a continuous layer of insulation that covers the entire exterior of the home. This cuts down on cold spots caused by framing, particularly in corners and at the floors. The insulation levels in your walls are increased to 30% above Building Code requirements.
Steel beams and openings in the garage ceiling are sealed with spray foam insulation to avoid critical heat loss. Your home has a fully sealed and continuous air barrier system installed. Remember, when hanging pictures or other items on exterior walls, attach fasteners into the wood studs, or use shallow nails or screws to avoid damaging the air barrier.
Daylight seen from the attic in the eave area is normal. The soffits and baffles located in this area help to ventilate the attic. The roof vents also ventilate the attic, and you may see daylight through these, as well. Snow build up on top of the roof vents may restrict attic ventilation and cause a build-up of warm, humid air in the attic. It is important to keep vents clear of excessive snow.
Although your ENERGY STAR home is very well sealed, it is not airtight, and some drafts may be detected on very windy days. This is normal. Drafts felt in front of windows on very cold days are often due to convective air movement over colder glass surfaces. Range hoods are equipped with dampers; however, they also do not provide a perfect seal.
Maintenance
Maintaining proper attic ventilation from the roof vents is important. After heavy winter storms, this may require clearing the snow off the roof vents.
Your ENERGY STAR® home has a number of lighting enhancements to improve energy efficiency. Many of the lights in your ENERGY STAR home contain LED light blubs. These light bulbs use significantly less energy than traditional incandescent light bulbs and last at least ten times longer. ENERGY STAR LED bulbs provide excellent lighting and are available to fit most light fixtures. They can be purchased at home renovation and hardware stores.
The electric panel installed in your basement contains circuit breakers. Each breaker controls several plug outlets or light fixtures. If you overload one of the circuits, the breaker will trip. Irons, vacuum cleaners, power tools, blow dryers, electric blankets and space heaters are some of the appliances that could trip a breaker. To reset the breaker, first push the tripped switch all the way to the ‘off’ position until it clicks. Then click it back to the ‘on’ position. If the fault reoccurs, there may be too many electrical appliances on that circuit.
Receptacles in the bathrooms, certain kitchen receptacles and receptacles on the exterior of your home are the GFCI (Ground Fault Circuit Interrupter) type. They are designed to prevent electrical shocks in wet areas. Pushing the small reset button located on the receptacle will reset this type of receptacle. A reset button located in one of the bathrooms (normally the powder room) controls all the other bathroom receptacles in your home. Check both the circuit breaker in the main electrical panel and the reset button on the receptacle, if the receptacle is not working.
Smoke alarms/carbon monoxide detectors are connected directly to the house wiring. Low quality candles that give off visible black smoke may cause a smoke alarm to malfunction. Excessive dust or soot from candles may accumulate in the alarm and cause it to ring.
Maintenance
Maintenance includes cleaning the smoke/CO detectors, changing burnt light bulbs and resetting tripped breakers. To clean the smoke alarms and CO detectors, inspect them to ensure that they are free of bugs and dirt, and gently vacuum the outside surface. Test your smoke alarms after cleaning.
ENERGY STAR® gas fireplaces are direct vent, sealed combustion units. They draw the combustion air from outside and exhaust the combustion gases out through a vent in the outside wall near the fireplace. Refer to the instruction and warranty booklets for complete information on the fireplace. There is a set of operating instructions located behind the grille at the bottom of the fireplace.
NOTE: The glass and the surrounding mantle assembly can become very hot to the touch after extended use of the fireplace. This is normal and is not a fire hazard; however, it can burn flesh. Take care to ensure that animals and people do not touch the glass or fireplace surround while the fire is lit.
Maintenance
Gas fireplaces are easy to use and require very little maintenance. The glass window can be removed for cleaning purposes by removing the two screws under the top grille.
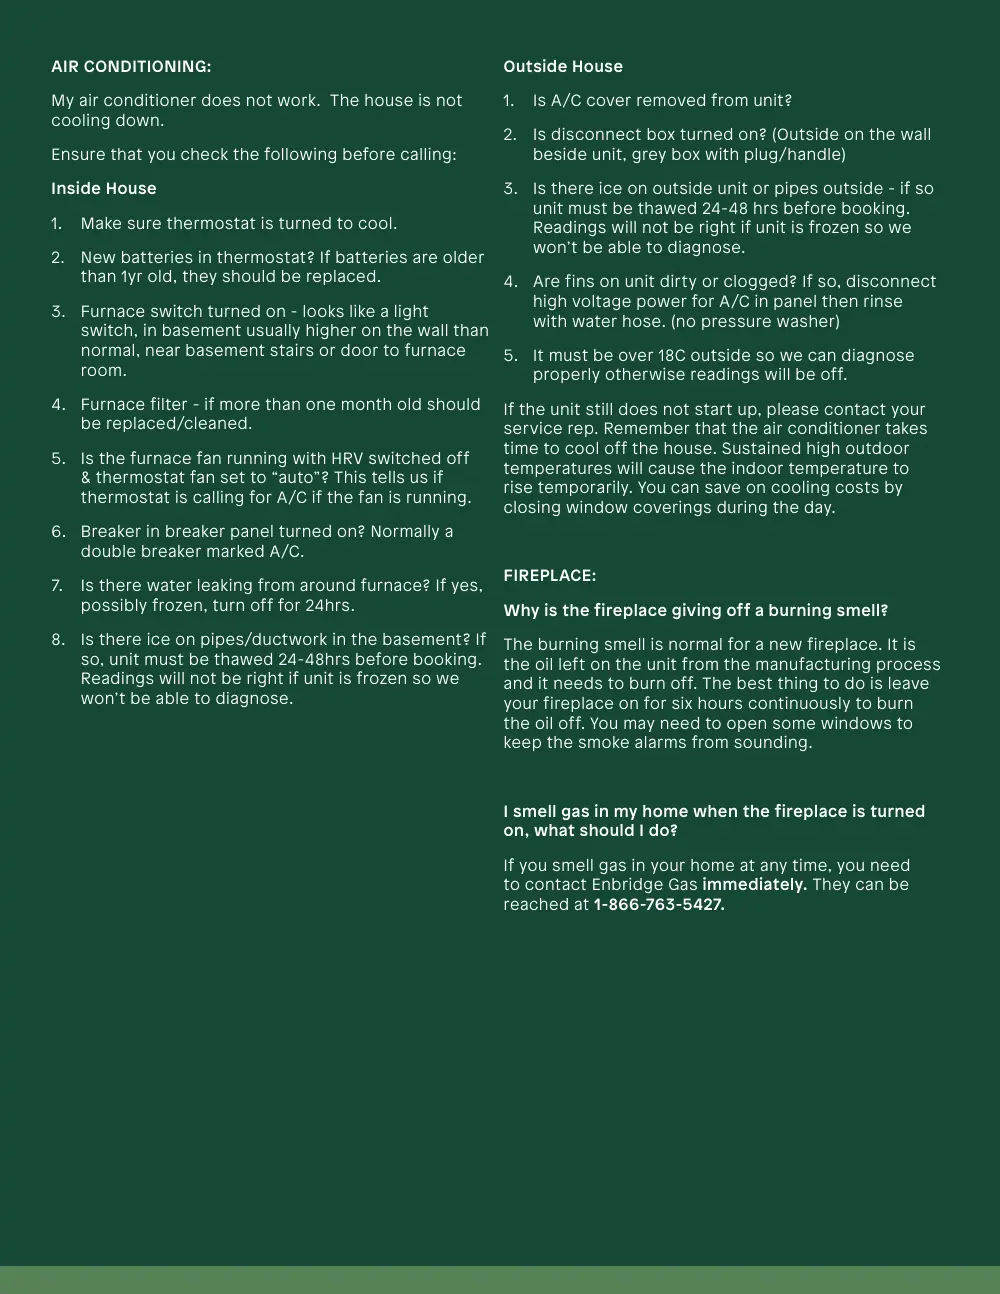
There may be minor oil residue left on your gas fireplace from the manufacturing process. The best way to remove the residue is to burn it off. The first time you use the fireplace, keep it burning continuously for about six hours. During this time, the unit may emit a burning smell, as well as a small amount of smoke, which may set off the smoke alarms. After doing this, the fireplace should not have a burning smell.
Variations in the thickness of different types of flooring may result in slight changes in height where they meet. Beveled transitions are installed, where required, to ease the height variance. Some types of floor coverings come with instructions and warranties from the manufacturer. Where relevant, a copy of these instructions and warranties are included in the Pre-Delivery Inspection Package.
Hardwood flooring is a natural wood product affected by changes in humidity and temperature. Gaps between boards may appear in winter and disappear in summer. This is unavoidable because indoor humidity is typically higher in summer than in winter. Winter humidity is naturally much lower, and maintaining summer humidity levels during colder months can cause condensation on windows. To minimize wood movement, keep the home’s relative humidity between 30% and 50% year-round and the temperature between 18°C and 26°C (65°F to 78°F).
Prefinished wood floors require no maintenance except a regular cleaning with a soft bristle broom or a dust mop to remove dirt and grit that can scratch the surface. Anti-scratch pads are advisable on chair and table legs to avoid dents and gouges.
Using water to clean wood floors will dull the finish and damage the wood. Occasionally use a cleaning product specifically created for wood floors to restore the lustre and beauty of the wood. Do not use self-polishing acrylic wax intended for sheet vinyl as it can make wood floors slippery and dull the finish. Additionally, water left on the floor, or high humidity levels inside the house will cause the boards to crack, split, cup, buckle or crown.
Maintenance
Remove dirt and grit by cleaning wood floors on a regular basis. Protect hardwood from the bottoms of chair and table legs and ensure to maintain proper humidity levels (between 30-50% relative humidity year round).
Vinyl (resilient) flooring requires limited maintenance. Dust mop to remove loose dirt and wash with lukewarm water and a mild detergent. Harsh detergents can cause fading, discolouration, or brittleness. Scuffmarks can usually be removed with brand name products, such as New Beginning and Shinekeeper. Avoid leaving water or wet items on the floor for extended periods, since this will result in staining. High heeled shoes and chair legs will make permanent marks on vinyl flooring. Plywood underlay seams and staples will sometimes show through the vinyl. They may be more or less visible depending on the vinyl colour and the lighting conditions in the room.
Carpets require weekly vacuuming throughout to maintain their original appearance and extend the life of the carpet. Dirt that penetrates to the base of the carpet fibre is a major contributor to carpet deterioration. More frequent vacuuming may be required in moderate and heavy traffic areas, such as halls and doorways. Remove spills immediately to help prevent spots and stains. Club Soda is a useful emergency spot remover. Always blot up a stain with a clean towel. Do not rub the spill into the carpet. Annual cleaning by professionals will extend the life of the carpet and improve the appearance.
Maintenance
Vacuum regularly, remove spills as they occur and have your carpets cleaned professionally every year.
Ceramic is long lasting and relatively easy to maintain. Soap and water are effective cleaners. Do not use harsh abrasive cleaners, especially on marble. Improper cleaning can cause stained grout and surface scratches. The joints between the tiles are water resistant if the grout used in these joints has not deteriorated. If the grout joints deteriorate, have them cleaned out and re-grouted. The caulking around the bathtub and shower may crack or separate during the first year due to shrinkage. When this occurs, remove the caulking, clean and dry the area, and then re-caulk with an appropriate silicone caulking. Tamarack will repair any cracks or separations at the twelve- month service date as part of our courtesy service. We will also replace tiles that crack due to settlement at the twelve-month service date as part of our courtesy service. However, a perfect colour match cannot be guaranteed due to changes in dye lots.
Maintenance
Clean regularly, replace cracked grout and cracked silicone caulking.
As your house dries out after construction, the framing materials will shrink and twist slightly, which may result in a squeak, cracking or popping noise. The sub floor is firmly screwed to the floor joists; however, connections between joists and beams, as well as connections between walls and floors make it impossible to have a totally noise-free floor assembly. Over time, some noises disappear. Tamarack will repair excessive noises at the year-end service date. Floor noises under vinyl, ceramic or hardwood cannot be repaired unless accessible from the basement.
Maintenance
Maintaining proper humidity levels in the house is crucial to prevent excessive dryness during the winter. Keep your house between 30-50% relative humidity year-round.
The foundation walls of your ENERGY STAR® home have additional insulation to decrease heat loss from the basement. The portion of the wall below grade is insulated on the exterior to keep the concrete basement wall warm and dry, plus it provides a drainage path to the weeping tile system. This also provides extra protection against basement leakage.
Surface pitting, cracking and rough textures are normal occurrences in concrete. The purpose of the concrete basement floor is to provide a flat, hard surface for storage, and a base for other floor covering materials. It is not a structural component of the foundation, and it is not intended to have a perfectly smooth surface. The basement floor, in the area of the floor drain, is normally sloped to allow drainage from the areas of the furnace and hot water heater. However, the entire basement floor is not sloped towards the floor drain from every location. Basement floors and walls may develop cracks due to settlement and shrinkage of the concrete. This is normal and does not indicate a structural problem.
Basement walls and floors may have areas covered with a white dust. This is efflorescence. As the concrete cures and releases moisture to the basement, the water draws salts out of the concrete and deposits them on the surface. Efflorescence is normal and can be removed with a stiff brush and water.
During the first year after construction, concrete releases a significant amount of moisture to the air. It is important to run a dehumidifier continuously in the basement to remove excess moisture in the air and keep the maximum humidity in your home below 50% relative humidity.
If you plan to paint your floor, choose a product with a concrete conditioning agent that will allow for continued curing. A reliable paint dealer will be able to advise you. Generally, concrete should not be painted within the first year.
When storing items in the basement, do not store them directly on the floor. Raise boxes, as well as paper, fabric and wood items off the floor to permit air to flow around the items and to prevent mould growth.
Temperature changes, humidity changes, and normal material shrinkage affect wood doors, jambs and trim during the drying-out process. This may lead to tightness or slackness of the doors in their frames, as well as slight warping between the trim and drywall. Do not adjust or plane doors due to these variations. Usually, they will re-adjust themselves. If not, ask us to adjust at the year-end service date.
Baseboards and trim will sometimes appear to be coming away from the wall, especially along stairways. This, too, is a result of the house drying out. Ask us to repair these cracks at the year-end service date.
Maintenance
Periodically clean and lubricate hinges and other door hardware. By controlling inside humidity levels, it will help to minimize cracking and permanent warping.
Your new kitchen cabinets and countertops are designed and manufactured to provide many years of excellent service. Warped or cracked doors will be replaced or repaired at our discretion at the year-end service date.
Maintenance
Regularly clean fingerprints and food spills from cabinet surfaces using warm water and a non-abrasive cloth, followed by a thorough drying. Avoid abrasive cleaners or products containing ammonia, as they may damage the cabinet finish and cause discoloration.
Regularly clean countertops with a soft moist cloth and detergent, or with a cleaner that is designed for the surface material. Abrasive cleaners and bleach may mark the surface. Avoid leaving liquids on the surface for extended periods. Do not use the countertop as a chopping block or cutting board. Hot pans may leave marks or crack the countertop surface. Keep countertop seams dry to prevent the surface from gapping and lifting.
As the house settles and dries, adjustments to the cabinet doors and drawers will be necessary. Make adjustments to the hinges and sliders with a screwdriver.
Faucets, toilets, sinks, tubs and shower stalls are not indestructible. They can chip, crack or dent from an impact. Stainless steel fixtures and sinks do not usually stain if properly maintained.
Maintenance
Regularly clean all fixtures using a non-abrasive cleaner designed for the appropriate surface. Steel wool pads are not recommended. Use a non-abrasive cleaner or a commercial stainless-steel cleaner. Scraping or banging metal utensils in a sink can cause scratching or dulling of the surface. Creaking noises and flexing from fibreglass/acrylic shower floors or bathtubs is normal.
Important Note: Scented Oils and Plumbing
Use cleaners and waxes specifically formulated for fibreglass or acrylic tubs and shower stalls. Do not use powdered or abrasive cleaners to clean fibreglass or acrylic. The caulking around the bathtub may crack or separate due to shrinkage. Should this occur, remove the caulking, clean and dry the area and then re-caulk with a silicone specifically formulated for showers and tubs. Tamarack will repair cracks or separations at the year-end service date as part of our courtesy service.
Do not pour scented oils down the drain; even a small amount can seriously damage your plumbing. The waste pipes in your home are made of ABS plastic. ABS pipes are the standard in the industry and have been used for decades. ABS is proven to handle the liquids typically poured down residential drains and is expected to provide many years of service in the home. However, ABS is a plastic and some products can damage it. Fragrant or scented oils are not compatible with ABS and the warning labels on these products indicate to avoid contact with plastics. It is important to read the warning label on any product before pouring it down the drain.
Source: B.E. Group
All exterior faucets are equipped with a shut-off valve inside the basement at the ceiling level. Your exterior faucets must be drained in the fall to prevent residual water from freezing and possibly fracturing the pipe. The exterior faucets are also equipped with hose bibs. These anti-siphon devices are installed to prevent water left in a hose from being drawn back into the water system in your home.
Winterizing Your Exterior Faucet:
a) Turn the basement shut-off valve to the closed position and leave it closed all winter.
b) Disconnect your garden hose, turn the outside valve to the open position, and leave it open all winter.
c) Pull the small pin on the hose bib (this backflow preventer is attached to the outside faucet) and let the water drain out.
d) Go back in the basement and open the small bleeder nut, located on the side of the shut-off valve. This allows any water that may still be left in the line to drain. Leave the bleeder nut open all winter.
Reverse these procedures to enable the use of the exterior faucets in the spring (after the concern of freezing is passed).
Leaks or water damage resulting from a cracked exterior faucet or hose bib assembly are not covered under warranty.
The Ontario Building Code requires your ENERGY STAR® home to have low flush toilets. These toilets use significantly less water compared to traditional models. On occasion, it may be necessary to flush more than once to remove all the waste in the toilet bowl. Low flush toilets also tend to block more easily. Have a toilet plunger available. If the toilet backs up during the first week you occupy your house, Tamarack will verify that there are no construction materials causing the blockage. Should a problem arise after the first week, it is your responsibility to contact a plumber of your choice.
A water supply line automatically feeds the basement floor drain with a small amount of water. This prevents the trap in the drain from drying out and doesn’t allow sewer gas to enter the basement. The supply line may be connected to the laundry tub faucet if the laundry tub is located nearby.
Cleanout caps are located near the bottom of the main drainpipes, as well as where the building sewer pipe leaves the house. Keep these cleanouts accessible for service.
Your new home has an “on-demand” hot water heater. It is very efficient, produces a constant supply of hot water (up to 20 litres per minute) and takes only a small amount of space. With the supply-on-demand system, the water is heated instantaneously as you turn on the hot water tap.
The on demand hot water heater is a small sealed-combustion boiler, fuelled by natural gas. It does not have a storage tank so your hot water system does not have the continuous loss of heat as there is with a conventional tank-type water heater. This helps to make the unit much more energy efficient.
As with your high efficiency furnace, both the combustion air supply and the exhaust are connected directly to the outdoors. Your gas furnace and gas water heater require these air supplies to work properly. High efficiency furnaces and water heaters do not require a chimney. They exhaust their combustion gases through plastic pipes in the wall or roof of your house. Ensure these pipes are kept clear of snow, vegetation and any debris.
The hot water heater is a rental from Reliance Home Comfort and therefore, all maintenance is the responsibility of Reliance Home Comfort.
Drywall joints are finished in a four-step process. This includes three coats of plaster, a sanding and then another check after painting. All drywall joints and paintwork are done by hand. While Tamarack strives to provide a perfectly flat and smooth wall surface, minor imperfections, such as bumps, creases, waves, and divots, are sometimes visible. These types of imperfections are considered normal, provided they are not readily visible when standing more than five feet from a wall. Certain lighting conditions and viewing positions may exaggerate minor imperfections.
Due to the shrinkage of the framing materials during the drying out and settlement period of a new home (up to two years), nail pops, cracks and minor defects may appear in the drywall. Nail pops are small bumps on a drywall surface appearing as a result of the drywall nail working itself out. These are more likely to occur at the peak of cathedral ceilings, above windows and around archways and the borders of the ceilings. Roof truss lift can result in cracks between walls and ceilings. This happens in varying degrees to every new home and cannot be controlled by the builder. However, maintaining proper humidity levels in the winter will minimize these conditions.
COURTESY SERVICE | Tamarack offers a courtesy drywall repair service at the time of the year-end service date. We will repair and patch settlement cracks and nail pops at that time. Sanding, painting and other wall refinishing of the repaired areas are not included in this service. Please consider this, should you choose to wallpaper or paint during the first year of occupancy.
Your Energy Star home is equipped with high-quality energy-efficient windows. The thermal pane glazing units have low-e coatings, are filled with argon gas and assembled with insulated spacers. The low-e coatings and the argon gas decrease heat loss through the glass. The insulated spacers decrease heat loss at the edge of the glass in the location where the highest heat loss occurs in a window. The frames of your windows are PVC.
Although the windows are weather-stripped, they may not be absolutely draft free in very coldand windy conditions. During very cold outside temperatures, convection on the inside surface of windows creates the perception of a draft. This result’s from the upward movement of warm air and the downward movement of cold air over the inside surface of the window. If the humidity of the inside air is high enough, condensation and ice can form on the inside surfaces of the window. This does not mean the window is defective or lacks insulation. Refer to the section on Climate Control – Condensation, for more information.
Thermal pane units are sealed to prevent air movement between the panes. Should the seal of the thermal pane fail within the warranty period; the window supplier will supply you with a new pane. Refer to the window warranty in the rear section of this Homeowner Manual. Labour costs to replace the pane are not covered under warranty.
Steel and wood doors require painting to protect the door. If the door surface begins to crack or is damaged, paint or refinish the door. Hinges on exterior doors are normally painted. Exterior doors have an adjustable weather-stripping on the bottom of the door. If daylight is visible around the door, ask us to adjust the weather-stripping at the year-end service date or you can adjust it yourself.
Maintenance
Your new windows require little maintenance other than to keep them clean (including the areas around the sash and closer mechanisms). Occasionally clean and lubricate the top and bottom track of basement sliding windows. It is important to clean the small drain holes in the bottom track of slider windows, since they are easily blocked.
Adjusting or replacing weather-stripping on doors is sometimes required after time, depending on the traffic. Doors and trim will require painting. Condensation, if allowed to accumulate, will build up into a block of ice at the bottom of the window. Ensure that the windows are kept dry to prevent damage to the finishes beneath the window. Refer to the earlier section on Climate Control for more information on condensation.
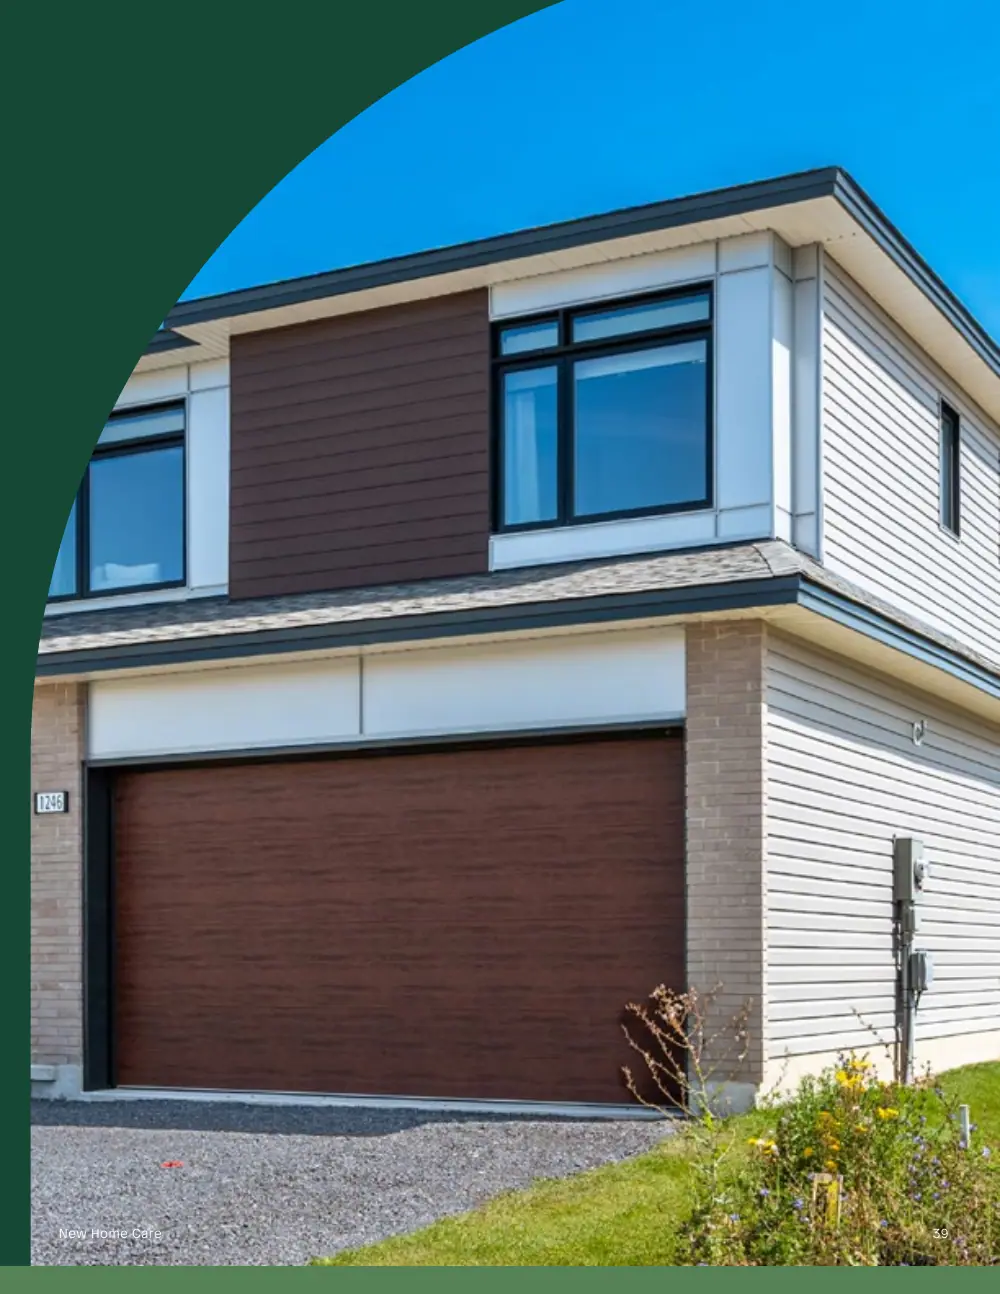
Cladding is the finishing material used to protect the outside walls of your new home. Common cladding materials include masonry (brick and stone) and siding (wood, metal, vinyl, wood composites and concrete composites).
Masonry | Brick and stone finishes are designed to last the lifetime of the house. Mortar usually lasts 25 years and the brickwork will likely require repointing at that time.
Masonry, brickwork and mortar joints are not waterproof. They are porous and absorb moisture. Masonry walls are constructed to take this into consideration. You may notice the lowest course of brick has occasional gaps in the mortar. These ‘weep holes’ are provided to allow drainage of moisture from behind the brick. Do not block these holes.
Hairline cracks in the mortar are normal. Mortar cracks of 2 mm or more will be repaired at the year-end service date. Occasionally inspect the brickwork for signs of movement and cracking. Although hairline cracks are not usually a concern, cracks that increase or change, should be investigated.
Siding & Trim | Metal, vinyl and composite sheet siding and trim are low maintenance and durable. The colour may fade slightly, depending on the exposure to the sun. Constant spraying with a garden sprinkler may cause discolouration. Under normal conditions, metal siding is strong but it can dent. Vinyl siding becomes very brittle in extremely cold weather and may shatter on impact.
Painted wood surfaces should last at least five years, depending on exposure to the sun and elements. Factory finished wood siding should last ten years. Peeling paint or wood knots bleeding through the paint will be repaired at the year-end service date.
Maintenance
Use extreme care with high-pressure washers when washing any type of cladding. They can force water through the cladding into the wall system and result in internal wall damage.
Avoid sprinkling water directly on any cladding system. Allowing a sprinkler to spray water against the cladding for long periods of time can eventually force water through the cladding and into the wall system. Although the cladding is designed to either shed water or remove a limited amount of moisture from the cavity behind, it cannot handle large amounts of water. For the same reason, avoid draining water from the roof directly onto the cladding system.
Clean metal, vinyl or composite sheet siding and trim annually with a mild, non-abrasive detergent.
Clean wood siding and trim annually using a brush and mild, non-abrasive detergent. Rinse the wood with clean water afterwards but avoid saturating the wood with water.
Never cover exterior cladding with soil; the cladding system is not designed to be in constant contact with moisture. Avoid building new structures, such as a deck, directly against the cladding material where there is potential for moisture penetration or snow to build up. Keep planting beds at least six to eight inches below the base of the cladding.
Note: Heat from barbecues can cause serious damage to siding: vinyl siding will distort, wood siding or trim may burn, and all types of siding can be discoloured.
Caulking & Sealing | Caulking is an important part of the exterior defences of your Energy Star home. Caulking is used to seal around penetrations through your walls and roof (at pipes, plumbing and vents), at locations where two types of cladding meet (at brick and vinyl siding, for example) and around some windows and doors. Also referred to as sealant, caulking fails over time by drying out and cracking. Caulking and sealant are designed for specific applications; some last more than ten years while others may deteriorate more quickly when exposed to heat and constant sun.
As your new house settles and components dry out, some of the caulking will be stressed and may crack or peel. Caulking will be repaired at the year-end service date.
At some locations, a spray-in-place foam insulation is used to seal larger openings or difficult to seal spaces. This foam insulates and is an air barrier. For the most part, it should not be visible and it does not require maintenance.
Maintenance
After the first year, check the caulking periodically for cracking or surface deterioration, especially on the roof and exposed areas that are subject to frequent changes in temperature. Remove and replace old caulking when it becomes weathered, before it has failed. Ensure you use the appropriate caulking for the application.
The roof on your Energy Star home is designed to provide superior protection for many years. Your roof has thirty-year shingles and felt paper along the eaves and valleys. Valleys have aluminum flashing.
Shingles | Slight variations in colour from one batch of shingles to another are common and not considered a defect. Take extreme care whenever walking on shingles, especially on very hot days. Shingles become very soft in hot temperatures and are easily damaged. In the winter, shingles become very brittle when frozen, allowing them to break easily if walked on. It is not uncommon for shingles to lift or push up during the first year. Tamarack will repair loose and lifted shingles as part of the year-end service.
Roof Vents | It is essential that roof vents are kept clear of snow to allow proper ventilation from the attic. Snow build up on top of the roof vents will prevent the ventilation of warm humid air from the attic, and contribute towards the formation of an ice dam. Keep vents clear of excessive snow.
Ice Damming | The Ottawa region experiences heavy snow, rain and freezing rain during most winters, along with drastic changes in temperature. These conditions contribute to the formation of ice dams on roofs.
Ice damming occurs when snow or ice on the upper portion of a roof melts, flows down the roof and then freezes on the lower edge of the roof. Normally the water runs harmlessly off the edge of the roof. Any restriction that traps ice or snow near the eave of a roof, however, can impede the flow of water and promote ice damming. If the resulting ice dam is sufficiently large, it can allow water to back up under the shingling beyond the areas protected by the felt paper membrane at the eave and result in water penetration of the roof. Figure 2 illustrates how an ice dam can prevent proper drainage from the roof and cause leakage problems inside the house.
The Ontario Building Code requires a felt paper membrane under the shingling at the eaves over heated areas of the house. This helps to prevent leakage from ice damming, but does not always eliminate it.
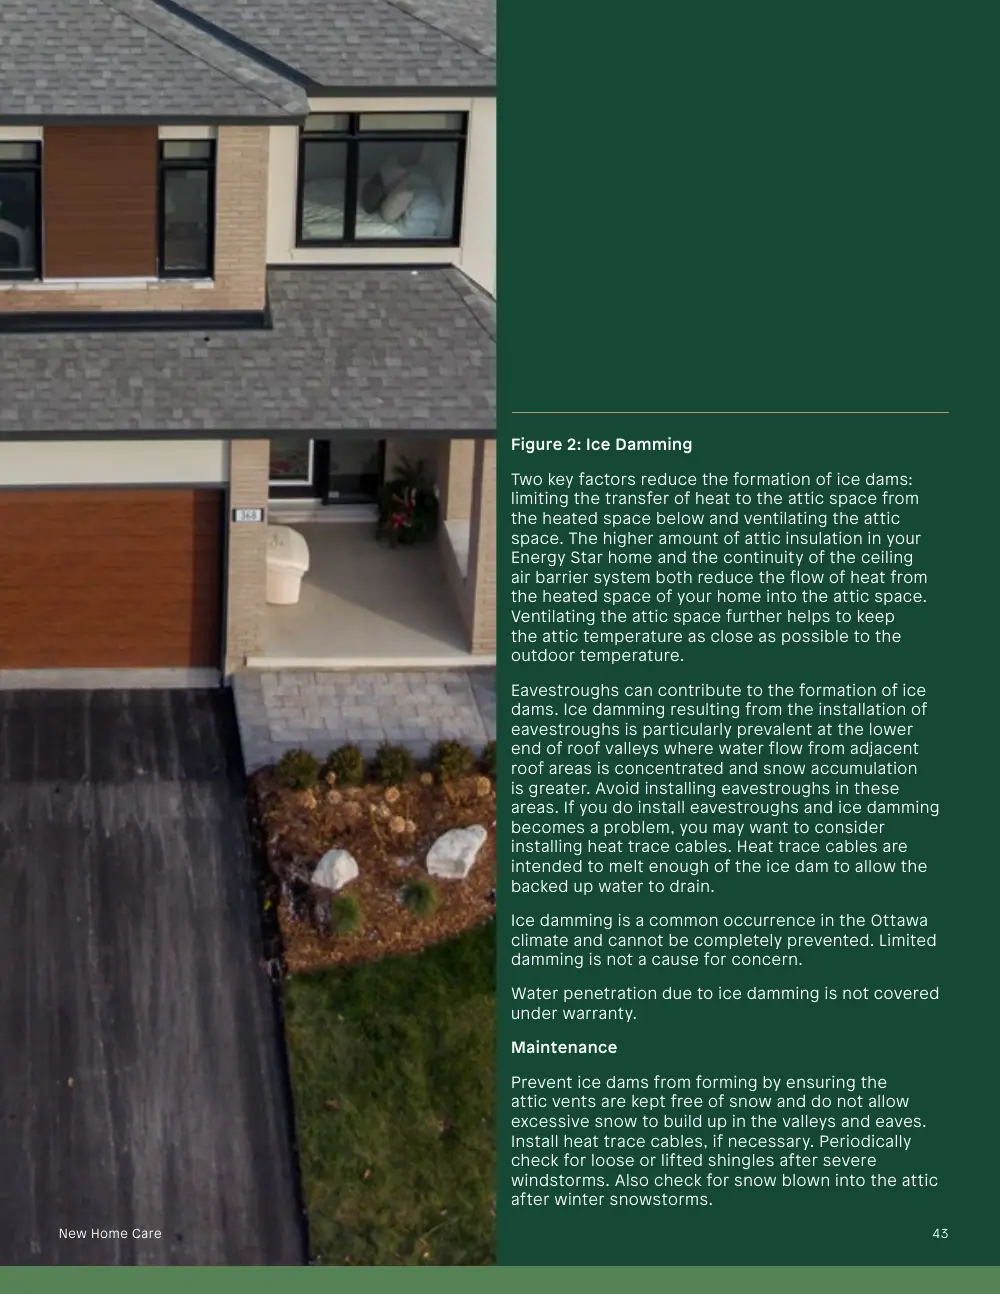
Figure 2: Ice Damming
Two key factors reduce the formation of ice dams: limiting the transfer of heat to the attic space from the heated space below and ventilating the attic space. The higher amount of attic insulation in your Energy Star home and the continuity of the ceiling air barrier system both reduce the flow of heat from the heated space of your home into the attic space. Ventilating the attic space further helps to keep the attic temperature as close as possible to the outdoor temperature.
Eavestroughs can contribute to the formation of ice dams. Ice damming resulting from the installation of eavestroughs is particularly prevalent at the lower end of roof valleys where water flow from adjacent roof areas is concentrated and snow accumulation is greater. Avoid installing eavestroughs in these areas. If you do install eavestroughs and ice damming becomes a problem, you may want to consider installing heat trace cables. Heat trace cables are intended to melt enough of the ice dam to allow the backed up water to drain.
Ice damming is a common occurrence in the Ottawa climate and cannot be completely prevented. Limited damming is not a cause for concern.
Water penetration due to ice damming is not covered under warranty.
Maintenance
Prevent ice dams from forming by ensuring the attic vents are kept free of snow and do not allow excessive snow to build up in the valleys and eaves. Install heat trace cables, if necessary. Periodically check for loose or lifted shingles after severe windstorms. Also check for snow blown into the attic after winter snowstorms.
The below grade portion of the exterior foundation wall has full height insulation to reduce the heat loss from the basement. The exterior insulation keeps the concrete basement wall warm and dry and provides a drainage path to the weeping tile system. This also provides extra protection against basement leakage. Refer to “Foundation” under “Interior Care and Maintenance” for more information on maintaining the interior surfaces of the foundation.
Foundation walls are subject to major temperature changes. The below ground portion of the wall is a fairly constant temperature while the portion extending above ground is subject to the summer heat and winter cold. Temperature changes cause concrete and masonry to expand and contract. Combined with the normal settlement of the house, this may cause cracks to appear on the basement walls. These cracks do not affect the strength of the wall. If a crack should leak within the two-year warranty period, we will repair it.
Minor cracks in the foundation finish coat (parging) are normal and do not require patching. Tamarack will repair any loose parging, at the time of the year-end service repairs. We do not recommend patching cracks in parging, since the color difference is usually more visible than the crack itself.
Grading and Drainage
The grading around the house is designed to drain water away from the foundation walls. The drainage pattern of each individual lot is part of a site-grading plan established for the entire development. Minor changes may be made during construction to facilitate particular lot conditions.
Settlement of the soil around the perimeter of the house will be repaired, if it is causing water to drain back towards the foundation. This is done at the time of the year-end repairs.
To assist water drainage on your lot, swales and catch basins are frequently installed. Swales cannot be changed. They must be kept free of landscaping, interlock, leaves, debris, gardens, shrubs and sheds. During the spring thaw, remove snow and ice in order to assist the flow of water.
Swales and catch basins are designed to drain water away under normal rainfall conditions. Heavy, prolonged rainfalls or spring thaw conditions may cause some water ponding for short periods of time. This is normal. Do not change the grading on your lot as this could affect not only your lot drainage but that of neighbouring lots as well. Homeowner regrading or subsequent improper landscaping that causes a leak will not be covered under warranty.
Note: Do not make any alterations to your yard until the municipality has determined the final drainage patterns are acceptable and has released Tamarack from further responsibility. Until final acceptance is received from the municipality, do not add fences, hedges decks, pools, or any other landscaping that could interfere with required remedial work.
Downspouts
Avoid landscaping and gardening that directs or holds water against the foundation. Ensure eavestrough downspouts direct water away from the foundation walls and away from the edges of the driveway. Use downspout extensions or sloped splash blocks to keep rainwater away from the wall. Water ponding in the area of a downspout after a heavy rain is normal.
Window Wells
Your home may or may not have window wells. If your house does, keep the wells free of weeds, dirt, ice, or other debris that may inhibit proper drainage. Window wells are installed with a four-inch drainage pipe extending down to the weeping tile. This pipe is normally filled with crushed stone to allow water to pass through. Do not store garden hoses, toys and other items in window wells. Leaks resulting from a poorly maintained window well are not covered by warranty.
Maintenance
Use downspout extensions or sloped splash blocks to direct rainwater away from your house. Keep window wells free of weeds, dirt, ice, or other debris that may prevent proper drainage.
If you have a catch basin within your lot lines, it is your responsibility to keep it free of leaves, debris and ice in order to permit water to flow and drain freely.
Decks
Decks are built with pressure treated and cedar wood. Both woods are exterior grade materials. The deck is either secured to the house foundation or sitting on cement piers. The bottom of the stairs sits directly on grade.
Maintenance
A wood sealant or stain applied to the deck will prolong the life of the deck and prevent the wood from fading and splitting. Split wood due to lack of proper maintenance is not covered under our warranty.
Concrete Slabs and Interlock
Concrete floors and porches often develop cracks due to the nature of the material, natural settlement and exposure to extreme temperature changes. This is not a cause for concern. Cracks of more than 2 mm will be filled at the time of the year-end service date.
Salt or other ice melting products can easily damage concrete porches and garage floors. Even if not applied directly, slush and melting ice from cars and foot traffic will deposit enough salt to cause damage. The area in front of and underneath the overhead garage door is especially prone to salt damage during the winter. This is due to the sun’s heat warming the floor during the day and the night time cold causing it to freeze. The frequent freeze/thaw cycles in that area allow the effects of the salt to work more rapidly. Chipping and scraping ice from the floor, even for safety reasons, can also damage the concrete surface. A very small chip in the concrete allows water to penetrate. When combined with the freeze/thaw cycle, pitting and spalling can occur. This type of erosion is not covered under warranty.
Interlock walkways are prone to settlement during the first year since they are laid over backfilled areas. Settlement that causes water to pond will be repaired at the year-end service date.
Maintenance
Annually apply a good quality concrete sealer to help protect concrete and interlock from salt damage. Tamarack Developments recommends using urea-based de-icing agents on concrete and interlock surfaces. Refer to “Foundation” in the previous section for more information on maintenance of the interior surfaces of the basement concrete floor slab.
Driveway
Your asphalt driveway is covered by warranty for one year from the date of possession or date of installation, whichever is later. Minor settlement, tire markings and some stone flaking are normal characteristics of asphalt. Visible aggregate is also normal. A driveway is designed for light duty traffic and you must take precautions to keep it in good condition. Driveway settlement of more than three inches will be repaired at the time of the year-end service repair. The affected areas will be patched; total re-surfacing will not be done.
Maintenance
Avoid the following potential causes of damage:
If the landscaping and other outside work is incomplete when you move in, we request your patience. This type of work is very dependent on the weather and soil conditions. The landscaping will be arranged as soon as conditions permit. Please be aware that not every lot can be completed during the first month of good weather and your understanding is greatly appreciated.
Sod | Sod is rolled and watered immediately after it is laid to promote future growth. After the initial watering by Tamarack, the sod becomes a homeowner’s responsibility. Frequent, even daily, watering during the first two weeks or so is essential. Once the grass has ‘taken’, weekly watering is usually adequate, if you water deeply to promote deep root growth. During the growing season, lawns require up to one inch of water per week, preferably applied in one watering. Short, frequent watering promotes shallow root growth and a lawn dependent on frequent watering. Tamarack does not replace sod after it is laid if it dies from lack of care. Walking on freshly laid sod or sod saturated from the spring thaw will create humps and dips. This is a homeowner maintenance task. Compacted snow and ice left on your lawn can cause ‘winter kill’. This is common along the sides of driveways.
Existing Trees | We attempt to save existing trees, wherever possible, during construction. However, grading and servicing the project may disrupt the water table and have a detrimental impact on trees and shrubs. Therefore, we cannot warrant existing vegetation. Any existing tree removal is the homeowner’s responsibility.
Newly Planted Trees | New trees require proper fertilization and maintenance to ensure their good health. Due to the compact root system of a newly transplanted tree, it often does not receive enough water from rainfall. Frequently water the tree pit during the spring and summer months to provide sufficient water and nutrients for your tree’s root system.
Keep tree pits (the soil area at the base of the tree) cultivated and free of weeds. Weeds extract valuable moisture and nutrients from the soil. To avoid this competition, regularly remove weeds, including their roots. Cultivate the top four to six inches of soil around the base of the tree in approximately a three-to-four-foot circle. This permits air to get to the roots more easily and allows the tree to breathe.
Keep the cultivated area at the base of the tree in a saucer shape (outer perimeter forming a four to six-inch high ridge) for the first two years to provide a reservoir for capturing and holding water. Never raise the level of earth above the base of the tree trunk. This can suffocate the tree and weaken it, perhaps killing it. Also, avoid planting flowers or grass directly around the base of the tree forthe first two years, for they, like weeds, compete with the tree for needed nutrients.
Generally, fertilize trees once per year in either early spring or late fall. Consult your garden supply centre for the properfertilizer and follow the manufacturer’s instructions.
Regularly inspect your trees for insect damage. Regardless of the health of a tree, insects can attack it. Again, consult a garden supply centre for specific instructions.
Maintenance
Properly fertilize and water your new lawn, trees and shrubs.
Once the foundation is poured, a survey certificate accurately locating your house on the lot is prepared as part of your legal documents. The survey pins at the corners of your lot may no longer be accurate due to grading and movement of soil. Do not rely on them to install fencing. Obtain the services of a surveyor to locate the lot lines and ensure your fence is built on your property. Always call the local utilities to locate underground services prior to digging.
Follow these good maintenance practices, and inspect your new home on a regular basis, to avoid problems.
INSIDE
OUTDOORS
INSIDE
OUTDOORS
INSIDE
OUTDOORS
INSIDE
OUTDOORS
CONTACT INFO:
Who should I call if I have questions about the construction or service at my house?
Your primary contact is always your Customer Care Representative, at 613-526-7979.
CONSTRUCTION:
Can I visit the house during construction?
No, you cannot make unscheduled visits to the home on your own. For safety and insurance reasons this is not allowed. You will have an opportunity to visit the home with our Site Superintendent prior to installation of the drywall, and again with an Inspector prior to closing.
When will the driveway be paved?
The backfill around the house needs time to settle. It is best to wait for close to a year before paving in order to avoid future settlement problems. Normally, driveway paving begins in the month of June each year and finishes by October.
When will the outside be painted?
Normally, exterior painting begins in late May. It may take some time until the exterior paint is complete on all homes that were built during the winter.
When will the trees be planted?
Ideally, trees are planted in spring or late fall for better survival.
What kind of tree will be planted on my lot?
Landscape plans are available for viewing at the sales office on your site. Tree types cannot be changed, since they are approved by the city.
PREDELIVERY INSPECTION:
How long will the inspection take?
Please allow yourself two hours, depending on the time of year and size of your home.
Who should and should NOT attend your Pre Delivery Inspection?
It is required that one purchaser, or their designate, attend the PDI. It is important that this includes the person(s) who will take over responsibility for the maintenance and upkeep of the house, after closing.
To help us provide you with the best possible experience during your PDI, attendance is limited to the registered purchasers of the home. Kindly note that the following individuals or activities are not permitted on the premises or inside the home during the PDI:
We ask that any appointments involving the above, as well as any planned events, be scheduled after your closing date.
CLOSING DAY:
Where do I get my house keys?
In order to make your closing as convenient as possible for you, once the funds have been transferred and the deal has closed, your lawyer will contact you with the necessary information on where to retrieve your keys.
Where are my garage door keys?
If your garage keys are not with your house keys, then they will be hanging in your garage on a nail by the door.
Can I schedule things such as movers, phone connection, appliances etc. for closing day?
We recommend that you do not schedule movers, or any appointments in the home on the day of closing. The closing process and transfer of the keys normally happens in the afternoon of closing day. It may save you time and money to schedule these things a day or more later.
Where do I pick up my mail?
Canada Post will provide you with this information on their web site or by calling them at 1-866-607-6301.
How do I get my garbage/recycling bins and pickup schedule?
To obtain a garbage collection schedule and/or information on how to obtain your recycle bins, please visit the City of Ottawa website or call the City at 311.
What action do I need to take in regard to the utilities?
You are required to inform the utility companies that you have taken possession of your new home. You may do so by going to the following websites and filling out the online form. Not all utility companies will apply to your new home; you only need to contact the ones that are providing service at your new home.
EMERGENCIES:
What do I do if I have an emergency service request?
If you have an emergency, please contact your Customer Care Representative or call our After-Hours Emergency line at 613-526-7979 *555.
An emergency includes the following situations:
REPAIRS:
Just moved in and the repairs from my PDI list are not completed. When will they be rectified?
Depending on the time between your Pre-Delivery inspection and your closing date, repairs may be in progress. A representative from Tamarack’s site office will contact you to set up appointments for the outstanding items. If parts need to be ordered, they may take several weeks to arrive. Follow-up repairs will be added to your Initial work order form.
INTERIOR:
Why are my windows full of moisture? There is ice forming along the bottom edge of the window.
If warm moist air inside the house comes in contact with the window glazing on a cold day, moisture may condense on the windowpane at the edges of the glass near the frame. On very cold days, the condensation may freeze, forming ice. You need to ensure moist air in your home is removed at its source. Run the HRV on high for 15 minutes after a shower and use the range hood when stovetop cooking to lower humidity levels. Refer to the section “Ventilation and Condensation” for more information.
How do I get my Energy Star certificate for rebate applications?
Energy Star certificates will be mailed to your home about a month after closing. If you require the documentation sooner, a digital copy may be available upon request from our customer care team. Please email the customer care inbox for your site for more information.
How can I find the paint codes for the colours used in my home?
If you require the specific paint codes for your home, these are available upon request from your customer care representative. Please email the customer care inbox for your site for more information.
EXTERIOR:
Why has my front walkway sunk down a few inches after the snow melted?
This is due to the normal settlement of the backfill around the house. Tamarack will repair this type of settlement, once, at the time of the year-end service repairs. If your year-end repairs happen during a winter month, the repair will be delayed until the following spring.
Where can I get my lot survey to plan my fence install?
Lot surveys are available upon request. Please email the customer care inbox for your site and our representatives will reach out with any documentation we have on file.
AIR CONDITIONING:
My air conditioner does not work. The house is not cooling down.
Ensure that you check the following before calling:
Inside House
1.
Make sure thermostat is turned to cool.
2. New batteries in thermostat? If batteries are older than 1yr old, they should be replaced.
3. Furnace switch turned on - looks like a light switch, in basement usually higher on the wall than normal, near basement stairs or door to furnace room.
4. Furnace filter - if more than one month old should be replaced/cleaned.
5. Is the furnace fan running with HRV switched off & thermostat fan set to “auto”? This tells us if thermostat is calling for A/C if the fan is running.
6. Breaker in breaker panel turned on? Normally a double breaker marked A/C.
7.
Is there water leaking from around furnace? If yes, possibly frozen, turn off for 24hrs.
8. Is there ice on pipes/ductwork in the basement? If so, unit must be thawed 24-48hrs before booking. Readings will not be right if unit is frozen so we won’t be able to diagnose.
Outside House
1.
Is A/C cover removed from unit?
2. Is disconnect box turned on? (Outside on the wall beside unit, grey box with plug/handle)
3. Is there ice on outside unit or pipes outside - if so unit must be thawed 24-48 hrs before booking. Readings will not be right if unit is frozen so we won’t be able to diagnose.
4. Are fins on unit dirty or clogged? If so, disconnect high voltage power for A/C in panel then rinse with water hose. (no pressure washer)
5. It must be over 18C outside so we can diagnose properly otherwise readings will be off.
If the unit still does not start up, please contact your service rep. Remember that the air conditioner takes time to cool off the house. Sustained high outdoor temperatures will cause the indoor temperature to rise temporarily. You can save on cooling costs by closing window coverings during the day.
FIREPLACE:
Why is the fireplace giving off a burning smell?
The burning smell is normal for a new fireplace. It is the oil left on the unit from the manufacturing process and it needs to burn off. The best thing to do is leave your fireplace on for six hours continuously to burn the oil off. You may need to open some windows to keep the smoke alarms from sounding.
I smell gas in my home when the fireplace is turned on, what should I do?
If you smell gas in your home at any time, you need to contact Enbridge Gas immediately. They can be reached at 1-866-763-5427.
ELECTRICAL:
Why are the outside plugs not working?
The Ground Fault Circuit Interrupter (GFCI) has probably tripped. The GFCI outlet is located by the front door or in the garage. Reset it by pushing the small reset button on the outlet. If the GFCI is not tripped, check the circuit breaker in the main electrical panel.
Why is the plug not working in the Main Bathroom or Ensuite Bathroom?
The GFCI in the Powder Room has probably tripped. The Reset button needs to be pushed to restore power to all three bathroom plugs.
FOUNDATION:
Why has the front porch slab (basement floor slab, garage floor slab) cracked?
As the concrete cures and hardens, it shrinks and may crack. Settlement and changes in temperature also contribute to cracking. Generally cracks do not indicate a defect and do not require repair. Floor slabs are not a structural component of your home.
Why is the foundation cracked?
As is the case with floor slabs, concrete foundation walls crack as a result of shrinkage and/or settlement. Generally cracks do not indicate a defect, and do not leak. If you detect leakage at a foundation crack, contact the Service Department.
Why is the garage floor or porch floor starting to flake?
Salt, combined with the winter freeze/thaw cycles, can cause serious erosion to concrete surfaces. Most often the front edge of the garage floor is affected. It is important to keep these areas clean and to apply a suitable sealer to the concrete once a year to prevent salt damage.